UNIVERSE SCENE
ROLE
Independent
DESCRIPTION
"Universe Scene" is the coursework of the module CSC8502 in Newcastle University. This module focuses on the game graphic skills based on OpenGL. I created a scene with different planets and a terrain with some characters on it. Skills like deferred rendering, alpha blending and particle systems are implemented.
TIME
2023.10-2023.11
GENRE
Game Graphic Project
PLATFORM
PC
Grade
88%
Development Notes
Introduction
This project is the coursework of module CSC8502 in Newcastle University. The course CSC8502 is about advanced game graphic skills based on OpenGL. The course provided us with some tutorials about the basic of OpenGL and some graphic skills like shadow mapping, deferred rendering and so on. The tutorial also introduced me how to write shaders in GLSL. All the shaders used in this project were written in GLSL. The coursework of this module is to create a space scene with a terrain.
The course lasts for 4 weeks. It took me 2 weeks to learn all the tutorials and 2 weeks to finish the coursework. In my coursework, I created a universe scene with two parts. One is some planets revolving around the sun. The other part is a terrain with some trees and characters on it.

Sun and Planets
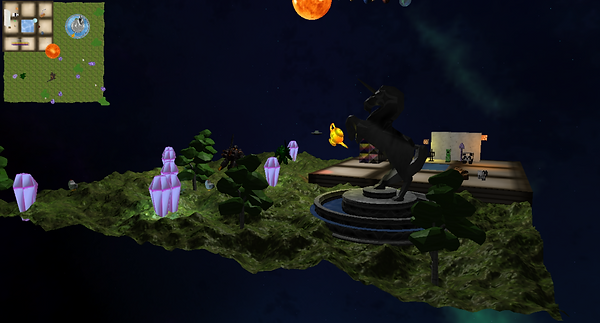
Terrain
I integrated the skills learnt in the tutorials in this project. Besides, I also implemented some graphic skills which were not mentioned in the tutorials. Here lists the features and skills used in this project. Full code can be viewed in https://github.com/Walker44182/CSC8502.
Features
1. .OBJ Format Meshes Loading
During our tutorial, all the meshes used are both in .msh format, which can hardly be found on the Internet. One of the most common mesh format on the Internet is .obj. So I decided to try to load in some .obj meshes which are not used in any tutorials. This is the first and also one of the most tough difficulty I've ever met during this project. I tried many different libraries to implement to this project in vain. Fortunately, I finally find a proper library to load .obj meshes into my scene.
This library inherited a new class from the Mesh class and provide the function to load in .obj format meshes.
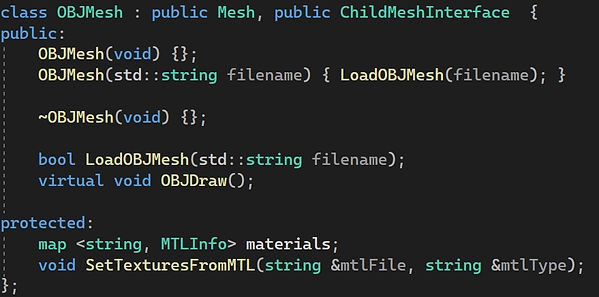
I also wrote a new function to render the .obj format meshes based on the function to draw other .msh meshes.


Fountain and lamp: two .obj meshes in this project
More Code
2. Texture Maps
Texture is one of the most important things in game graphic. I used three different kinds of texture maps in this project. Two were mentioned in the tutorial: diffuse texture and normal texture. Another one is specular texture which was not mentioned in the tutorial. Not all the meshes in the scene have all three textures: some have both while some didn't have specular texture and some only have diffuse texture.


Texture files of the "earth" and the "earth" in the scene
3. Scene Graph
Every meshes in the scene are included in a scene graph, which means that they are both one certain scene node of the scene graph. The scene graph of this project can be simplified as the graph below.

The child scene node of one parent node will rotate when the parent node is rotating. This is how I made the planets rotating with the sun and the moon and satellite rotating with the earth.
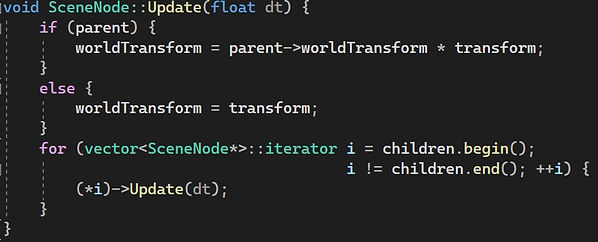

Planets rotating with the sun
More Code
4. Environment Mapping
I added three environment mapping scene nodes in the game: an ice plane, a pool and a diamond planet. The skybox will be mapped into the surface of them.

Skybox reflected in the ice plane
5. Skeletal Animation
Animation is one of the most vital thing in the game. I added three different meshes with skeletal animation: trees, chickens and solider characters to the scene.
I made the animation playing in different rate by adding different values to the frame time per frame.


One thing to note here is that the soldier character mesh has different materials in different parts of its body. So the textures of it is loaded by material files instead of loading in the texture files directly. This is same for the .obj format meshes.
More Code
6. Particle System
The particle system is not mentioned in the tutorials, but it is also an important part in the games. So I decided to add the particle system to the scene. There are two kinds of particles in this project: one snow particle and one blocks particle. The visibility of the particles can be toggled.
Essentially speaking, particles are many small game objects that will be generated changed and reset by some rules. Taking snow particles for example, the particles will be generated at the position where the x location varies in -1500 to 3500, y location is 3000 and z location varies in -1750 to 3250, with the speed varying from 1 to 16, scale varying 10 to 20 and random colours. The particles will be reset when its y location reaches 0.


More Code


Two kinds of particles
7. Rendering Pipeline
The rendering pipeline is the most important thing I learnt from CSC8502. It is the process of how the graphic is handled and presented. The rendering pipeline of this project is based on the rendering pipeline of the deferred rendering in our tutorial. Since I loaded in some OBJ format models and some texture maps which were not used used during the tutorial, the final rendering pipeline of this project is much more complex than the original one.
In the beginning, the renderer will be initialized after the window is created.

During the Initialization, shaders will be loaded and camera, lights and buffers will be initialized. Some OpenGL features like seamless skybox, face culling will be set to active.

After the initialization, the scene will be updated and rendered every frame.

RenderScene() is the main part of the rendering pipeline of this project. This function can be divided into seven parts: sort objects, draw shadow, draw skybox, draw objects, draw lights, post process and draw mini map. The shadow, skybox, game objects and lights will be rendered into different frame buffers firstly, and then be combined.

7.1 Sort Objects
The first thing to do is to find the objects to be rendered and the right order of the objects in the scene to be rendered.
The frustum culling is implemented and can be toggled in this project. There are some objects are set to always not to be culled by the frustum. When the frustum is turned on, any objects outside the frustum and not being set to not to be culled will not enter the rendering pipeline.
The correct order for Alpha Blending to work normally is to render opaque objects ahead of transparent objects. And the transparent objects should be drawn in back to front order.


Looking through transparent glasses
7.2 Render Shadow
Before drawing the shadow, all the frame buffers used in the pipeline will be cleared firstly. The shadows of the objects in the scene will be rendered into the frame buffer called shadowFBO. The shadow will be visible only when a lantern in the scene is turned on. This will be illustrated in later part.

As mentioned above, the opaque objects will be rendered ahead of the transparent objects.

Since both the shadow of the object, the object itself and the objects in the mini map need to be rendered through the function DrawNode, I used a mode parameter to distinguish if current process is to render the shadow or the object. When it is set to 1, the shadow will be rendered.

As mentioned above that there are environment mapping objects, objects with skeletal animation and others. They need to be rendered in different shaders. So I used a variable called "Draw Method Type" to distinguish them. There shadow also need to be rendered in different shaders. It can be seen from the code that there are 4 different methods to render different kinds of objects.
Taking the first method for example, the light that casts the shadow is located at (2000, 1500, 2000), and the light goes to (0, 0, 0). So the start and end location of the view matrix are those two points respectively. The uniforms will then be uploaded to the shader.
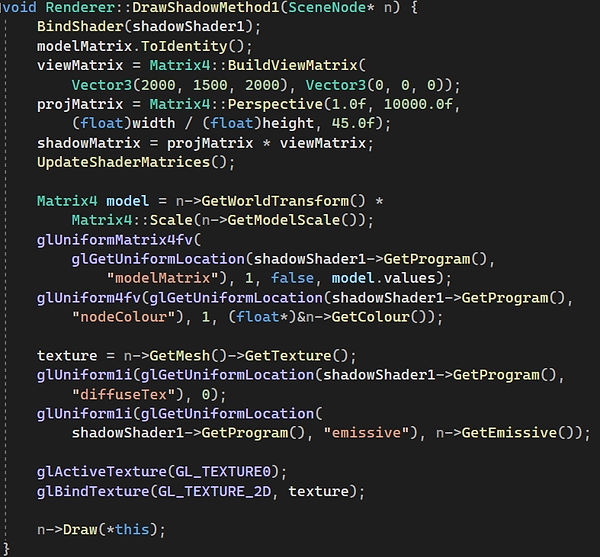
Since the shadow will be rendered every frame with the change of the objects, it is real-time shadow.

More Code
7.3 Render Skybox
The skybox will be rendered to skyboxFBO.


More Code
7.4 Render Objects
The next step is to render all the objects in the scene. The objects will be rendered to bufferFBO in this step.

Like rendering shadow, the opaque objects will be rendered ahead of transparent objects in the function DrawNodes. As mentioned above that there is a variable called "Draw Method Type" that determine which shader will be used to render a certain object. The detail what a certain type stands for is introcued in the comments below.

7.4.1 Common Objects
The objects that don't map the environment, don't have any skeletal animation and are not particles can be seen as common objects. As mentioned above that an object can have 1 to 3 kinds of texture map, so the objects that have only diffuse map, have diffuse map and bump map and have both of the three maps is denoted as type 1, 2, 3 respectively. The visibility of the specular map can be toggled, which will be illustrated in later part.
Taking DrawMethod3 for example, the uniforms that save model matrix, node colour, diffuse texture, is emissive and shadow texture are necessary to all the shaders to render objects. In this type, the bump texture and specular texture are also needed to be uploaded to the shader.
It is mentioned above that there are .obj meshes in this project, and a function called OBJDraw is designed to draw the .obj meshes. So in the function Draw, the program will judge that if the current object is .obj format, then use the right function to render.

More Code


7.4.2 Environment Mapping Objects
For environment objects, the camera position and skybox texture will also be uploaded to the shader.


More Code
7.4.3 Skeletal Animation Objects
For objects which have skeletal objects, the current pose of the animation will be uploaded to the shader. Besides, since the mesh of these objects has many submeshes, there will be a loop that render the submeshes one by one. This is same when rendering the shadow of the skeletal animation objects.

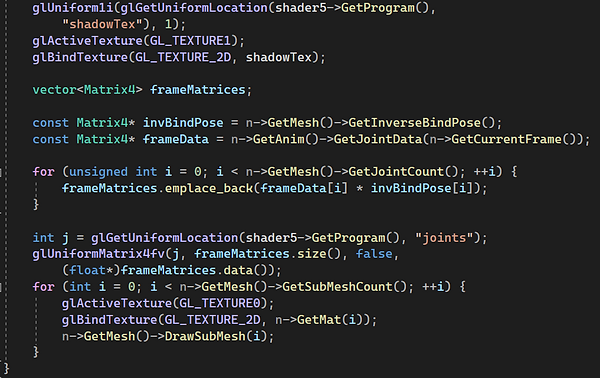
More Code
7.4.4 Particles
Essentially speaking, the process of rendering particles is almost same as rendering common objects. Particles can be seen as many common objects with only diffuse texture and they use the same shader. The only difference is that, as mentioned above, the visibility of the particles can be toggled. So the rendering logic will not be performed when the particles are turned off. This is same when rendering the shadow of the particles.

7.5 Render Lights
The lights will be rendered to pointLightFBO (including spot light). Then, the colour of this frame buffer will be cleared to (0, 0, 0, 1), the blend mode will be turned to additive blending, the front-facing polygons will be culled and the depth test will be turned to always pass. There are two kinds of lights in this project: point light and spot light which is not learned in tutorials.

7.5.1 Point Lights
The point lights in the scene are: sunlight, 8 crystal lights, shroom light and redstone light in Minecraft terrain, the lamp light revolving with the fountain and a lantern that will cast shadows.
Let's begin from the lantern. The lantern can be switched on and off by pressing "1". The shadows will only be visible when the lantern is tuned on. This is because the uniform shadow texture will only be uploaded to "lanternLightShader" used to render the lantern light. It is mentioned above that the specular map can be toggled. It can be seen here if the bool variable "specularMap" is false another shader will be used to not render the specular map.
Moreover, when the lantern is switched on, it will be set to emissive like other objects that can be seen as the light source (sun, lamp). When the objects is set to be emissive it will always be lit up.
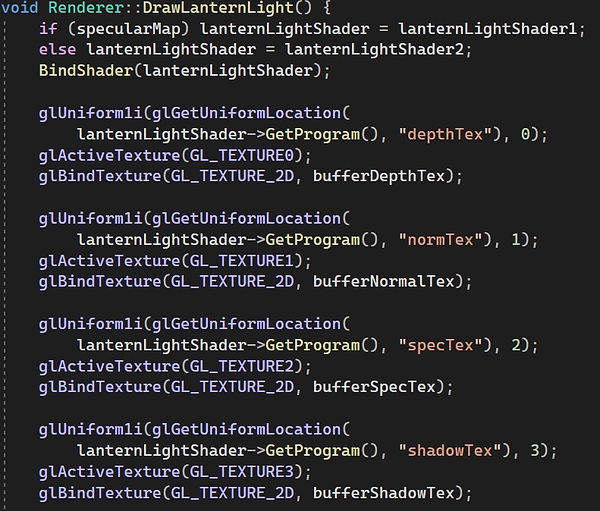


Toggle shadow and specular map
More Code
7.5.2 Spot Light
There is a spot light in the scene. The spot light is under a UFO whose location can be controller by the user. Besides, the colour of the spot light and the UFO is also controllable.
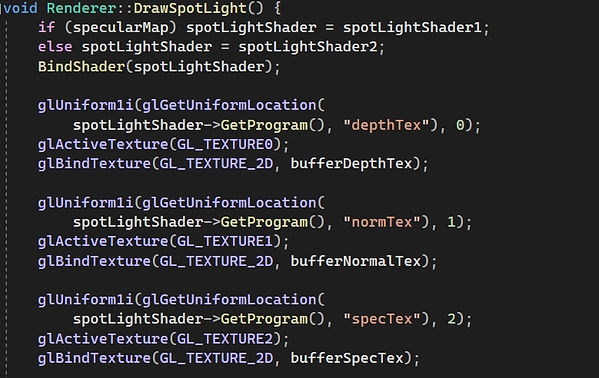

More Code


UFO changing colour automatically when snow particle is on
7.6 Combine Buffers
The next step is to combine the things rendered in previous steps together. They are rendered to different FBO and is also the colour attachment or the textures of corresponding FBO. Now it's time to render those textures into one FBO: combineFBO. The textures that are about to be combined can be checked using NVIDIA Nsight frame debugger.
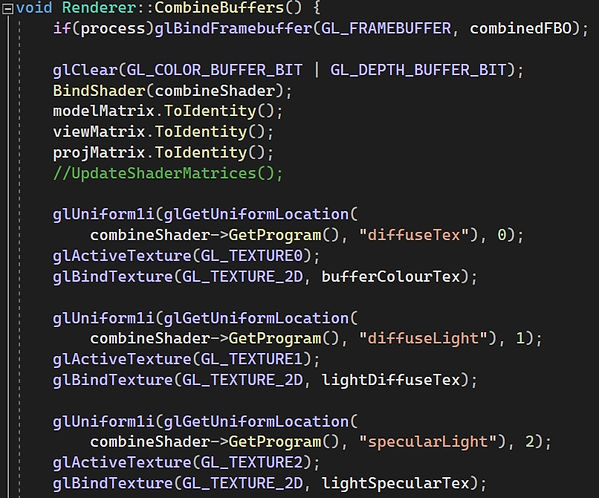

More Code
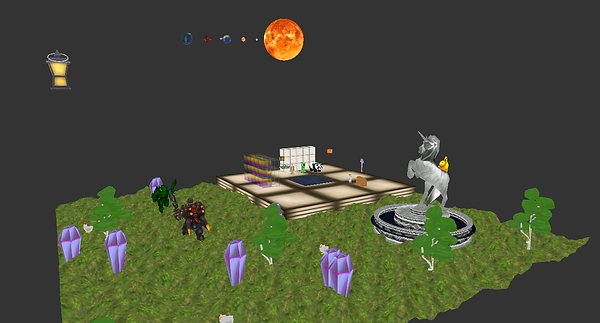

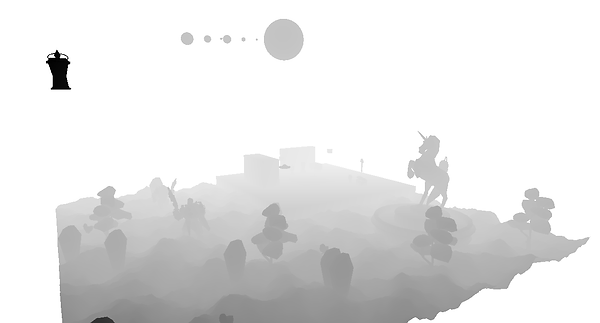
Diffuse texture, diffuse light and depth about to be combined (Saved from Nsight frame debugger)
7.7 Post Processings
There are two post-processing effects implemented to the project: colour correction and Gaussian blur.
7.7.1 Colour Correction
The colour correction post processing is not mentioned in the tutorials. When colour correction is turned on, the exposure can be adjusted.


More Code
7.7.2 Gaussian Blur


More Code
7.8 Render Mini Map
Finally, the mini map will be rendered. Like rendering objects and shadow, all the objects will be rendered. The mode of the function DrawNodes is set to 2.

Taking performance into consideration, the particles will not be rendered to the mini map. The objects with skeletal animation will be rendered by a different shader with other objects.

The shader to render the objects in mini map is different with the shader to render the objects in the main scene. The forward rendering is applied to the mini map instead of deferred rendering, and the lights will not be rendered to the mini map.


More Code
7.9 Summary
In summary, the rendering pipeline can be illustrated in this diagram.

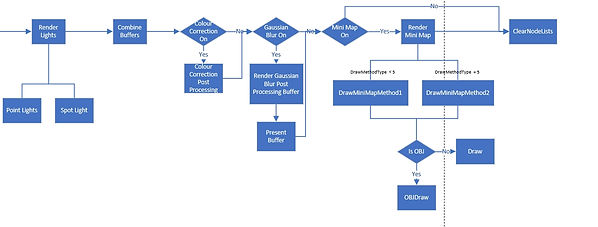
More Code
8. Movie Mode
When in the movie mode, the camera will move through different places in the scene automatically like movie.


Summary
In summary, this project integrated what I learned in the tutorials well. The most important thing I learned through this project is glsl shaders programming and rendering pipeline designing. Moreover, this project also implement something not included in the tutorials like .obj meshes loading in, spot lights, colour correction post processing and so on.
Here's something can be improved about this project. Firstly, advanced shadow like multiple shadow maps or cascade shadow can be applied. Then, more post processing like lens flare, HDR and stencil buffer can be implemented. And finally, some more particles like lightning or fire are also something good and skillful to be added to this scene.
The final grade of this project is 88%. The tutor of this module Dr. Rich Davison commented about this project: "A nicely laid out scene with many different rendering elements implemented. Overall, the scene is a very good demonstration of how to integrate all o the core elements of the module together, and in some places go beyond."