GOAT ADVENTURE
ROLE
Independent
DESCRIPTION
"Goat Adventure" is the coursework of the module CSC8503 Advanced Game Technologies in Newcastle University. This module focuses on three most important and basic skills in developing games: physics engine, AI and network. I designed a simple game that integrated all these three skills. I also enhanced some skills learnt from the class and developed some more gameplay in this game.
TIME
2023.11 - 2023.12
GENRE
Game Technology Project / Adventure
PLATFORM
PC
Grade
92%
Development Notes
Introduction
This game is the coursework of the module CSC8503 Advanced Game Technologies in Newcastle University. This module provided us the tutorials of three important game developing skills: physics engine (raycasting, collision detection, constraints and so on), AI (state machine, behaviour tree, pushdown automata) and networking (networking protocol and structuring data). The coursework of this module is to develop a game that implement and enhance the skills learnt from the tutorials.
It took me 2 weeks to learn the basic theory of these skills and 2 weeks to integrate them into one game. For coursework, I designed and developed an adventure game. The player will control a goat to overcome difficulties like finding a key to pass a locked door or running away from the enemies, then collect the target item and take it back to the spawn point.
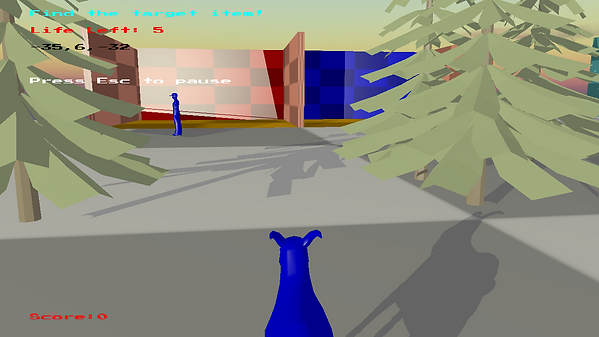
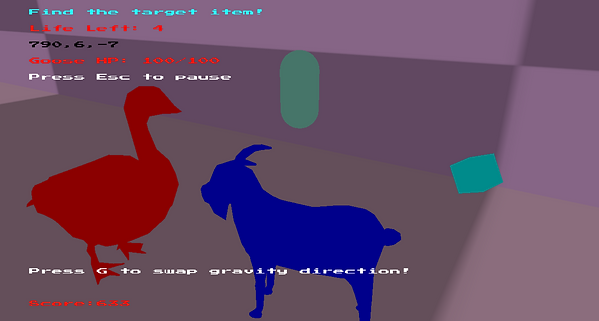
In this game, I integrated the skills in the tutorials. I also enhance some of them. For example, the tutorials introduced about quadtree as the spatial acceleration structure and I enhanced it to octree. Besides, I also designed and developed some other gameplay based on these skills like power-ups and score system. Here's some features of this game. Full code can be viewed in https://github.com/Walker44182/CSC8503.
Features
1. Code Base
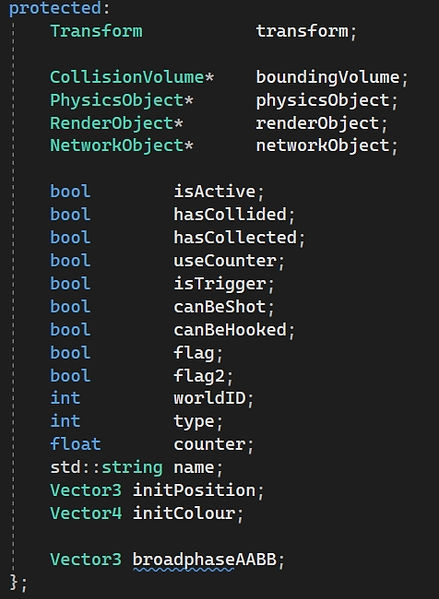
The code base of this project is provided by the tutorials of this module. The objects in the game are members or child classes of the class GameObject. Most important variables of this class are RenderObject, PhysicsObject and NetworkObject. This project mainly focuses on PhysicsObject which defines the physics features like mass, collision resolution methods, force and so on, and NetworkObject which defines the networkID of the object. Another important variable here is "type" which can classify the objects by its type. Besides, there is a class called "GameWorld" in the project which holds the game object lists of the world. Functions to add or remove objects, or perform raycasting are defined in this class, too.
2. Collision Volume
Variables of GameObject
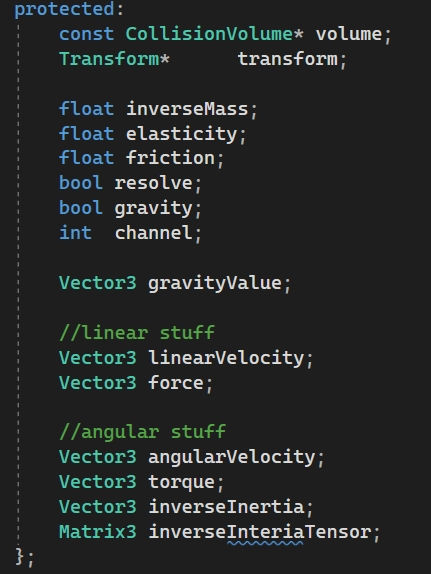
Variables of PhysicsObject
More Code
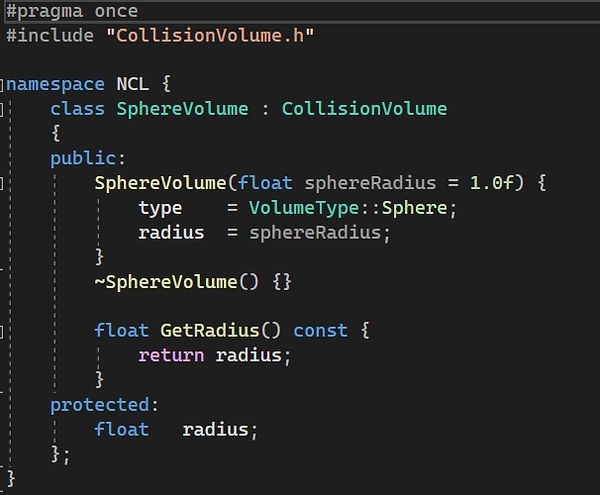
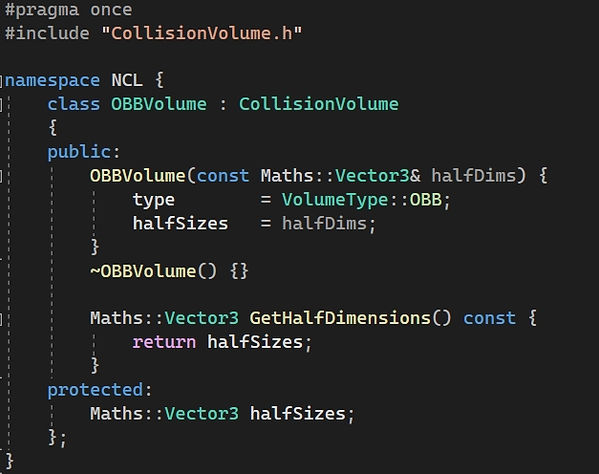
Collision Volume is one of the most important part of the physics engine, and is the base to implement collision detection and resolution. I used 3 kinds of collision volumes: Sphere, AABB and OBB. Capsule collision volume is also defined in this project but not used. Plane collision volume is missied.
More Code
3. Raycasting
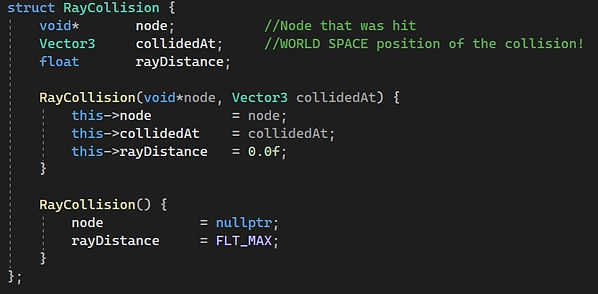
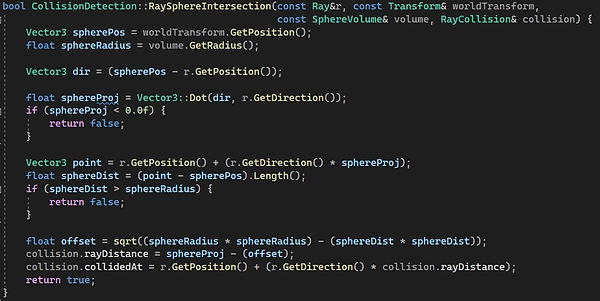
Raycasting is one of the most basic skills in game developing. The ray is defined by the starting position and casting direction. It's mostly used in objects detecting: launch a ray from a start position in a certain direction and see if the ray hit any object. If so, the node object it hit, the position where the collision happened and the distance the ray travelled will be returned. In this project, I implemented the detection of the intersection of the ray and sphere, AABB and OBB collision volumes.
Ray Collision Definition
Detection of Intersection Between Ray and Sphere

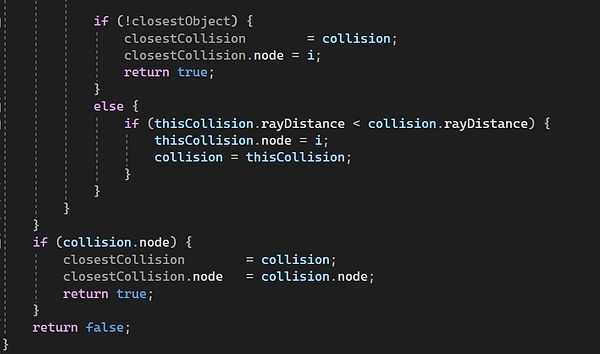
Raycast Function
In this project, raycasting was implemented many different gameplay functions like enemy AI, menu system and so on, which will be introduced later.
More Code
4. Motion Simulating
In this project, both angular and linear motion will be simulated. The objects in the game can be moved by adding force (linear motion) or torque (angular motion). The force can be calculated to motion by Newton's Second Law. The force will first be calculated to acceleration, then be calculated to velocity and finally be calculated to the distance it should be moved in one frame.
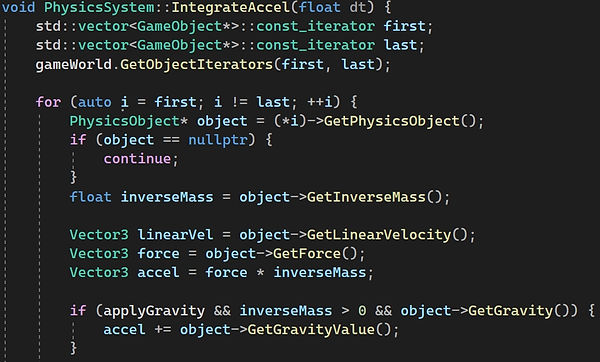
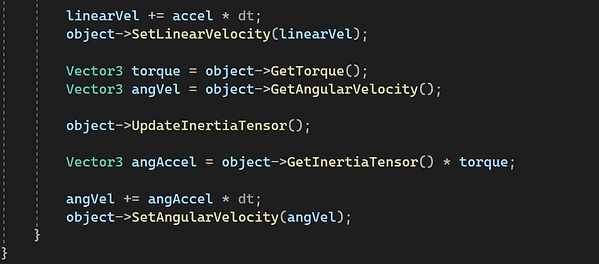
Calculate Acceleration and Velocity
More Code
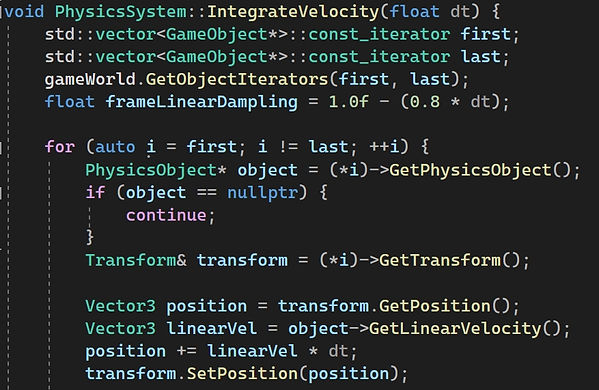
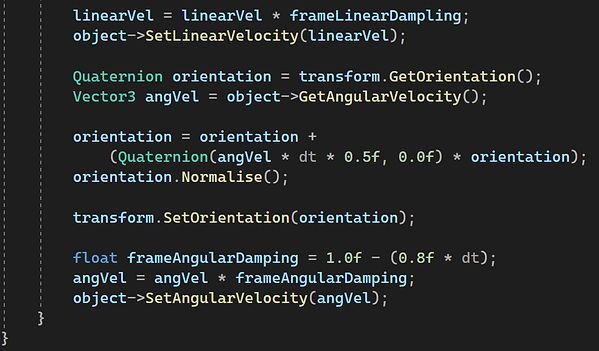
Calculate Position
5. Collision Detection
The collision detection including the detection of intersection of two AABBs, two Spheres and AABB and Sphere, which are included in the tutorials. I also implemented the detection of intersection of two OBBs, OBB and AABB and OBB and Sphere.
When the intersection is detected, the contact point of two objects, the collision direction (normal), and the how much these two objects have intersected (penetration) will be saved.
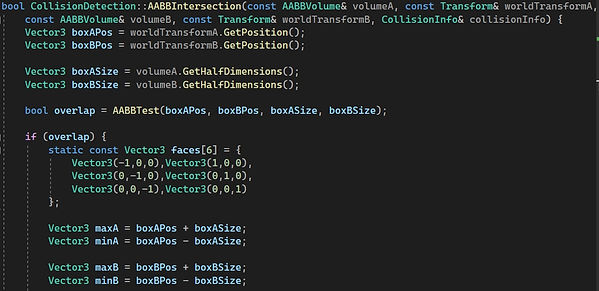
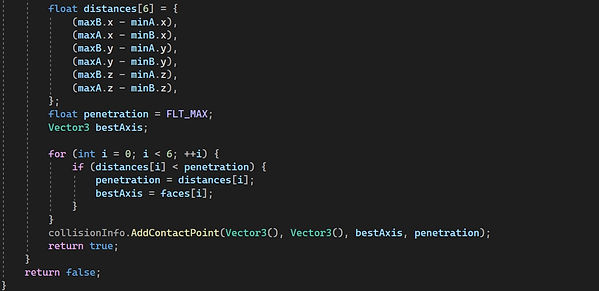
Two AABBs Intersection
More Code
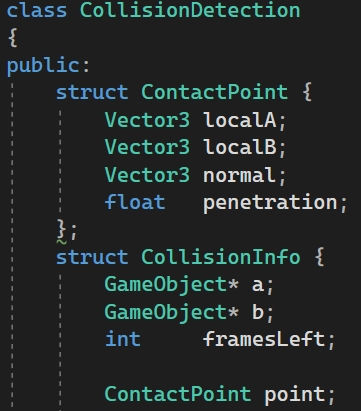
Contact Info
6. Collision Respond
I implemented three different kinds of collision respond methods: Besides impulse resolve collision which is introduced in the tutorials, I also implemented projection resolve collision and penalty resolve collision. There is a "channel" variable in the PhysicsObject that defines which respond method should be used. If the "channel" of one object of the two colliding objects is set to projection or penalty, the projection or penalty respond method will be used. If the "channel" of both of the two objects were set implusive, the impulsive respond method will be used.
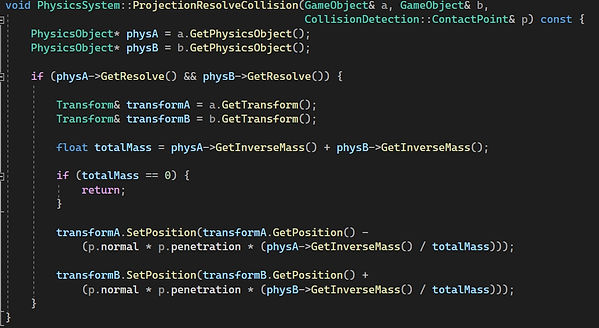
Projection Resolve Collision
More Code
7. Constraint
In this project, I implemented the position constraint introduced in the tutorial and orientation constraint.
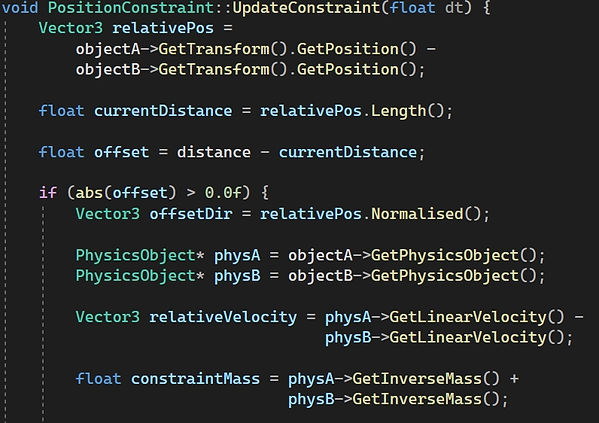
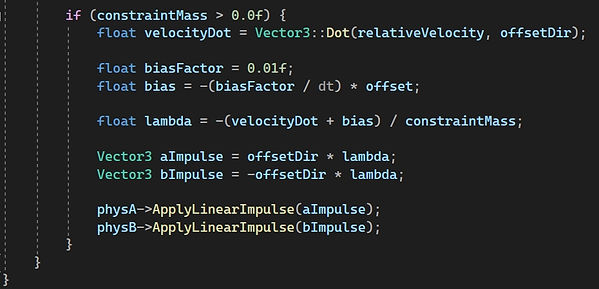
More Code
8. Spatial Acceleration Structures
When performing collision detection, the program will go through each game objects to see if one object is intersecting with the other one, which is very expensive in calculating.
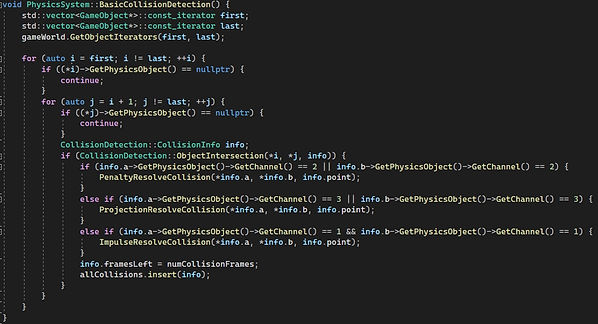
Our tutorial introduces the quadtree which divides the game space into 4 semi-spaces. The program first sort out which semi-space each object is in (board phase) and then only check if one game object is intersecting with any objects in the same semi-space with this object (narrow phase), which reduce the amount of calculation.
In this project, I enhanced this structure to octree which can divide the game space into 8 semi-spaces. This can further reduce the amount of calculation.
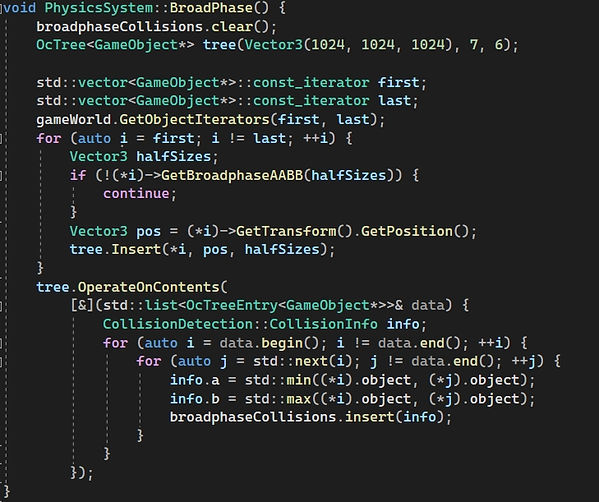
Broad Phase
More Code
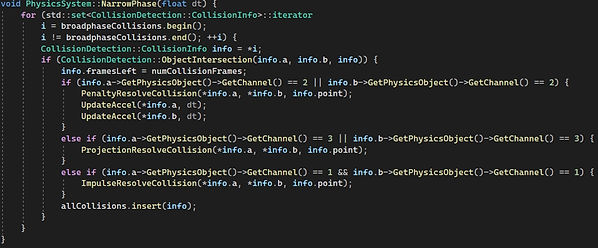
Narrow Phase
9. Other Physics Features
There are some other physics features implemented in this project.
Gravity: Simulate gravity, the value of the gravity can be changed. Objects can be set to agravic and the global gravity can be turned off.
Resolve: If the bool flag "resolve" is set to false, the collision will only be detected but not responded.
Elasticity: Used in impulsive resolve collision, the bigger the elasticity is, the bigger the impulsive generated in the collision will be.
Friction: Used in impulsive resolve collision, the bigger the friction is, the bigger the friction impulse will be. That means a bigger damping will be caused to damp the objects' motion.
More Code
10. State Machine
State machine is a common structure to implement AI. It allows an object to perform different logic in different states. The state will transit when some condition is met. In this project, some simple AI is implemented by state machines.
More Code
11. Behaviour Tree
Behaviour tree is an advanced method to implement AI. It allows the object to perform some logic in sequence or select a certain logic to perform based on certain condition. In this project, some complicated AI is implemented by behaviour trees.
More Code
12. Pathfinding
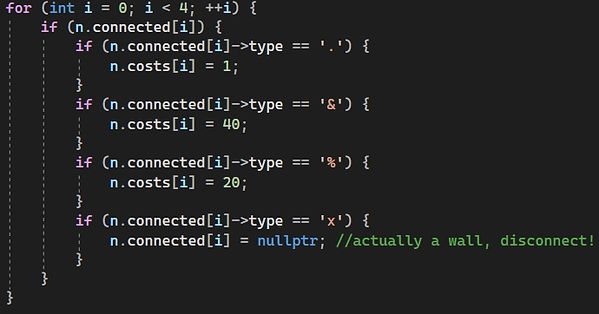
The pathfinding system implemented to this project is based on A* algorithm. This algorithm is based on the navigation grids, which means the game terrain should be divided into multiple grids. Each grid has its own cost value. The algorithm will calculate the path with the least cost from the starting grid to end grid.
In this project, a maze area is divided into 361 (19 * 19) grids, which is saved in a txt file.

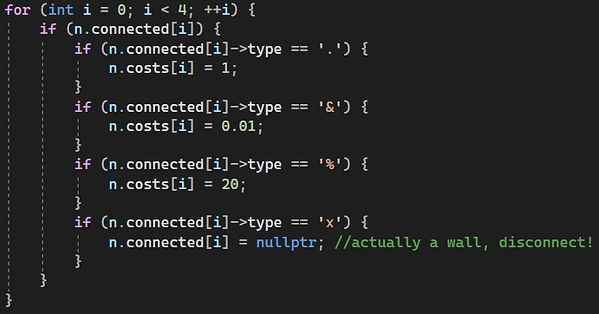
Dot means the grid has a cost value of 1, "&" means the grid has a cost of 0.01, "%" means the grid has a cost of 20, and cross means the grid is actually a wall and is disconnected.
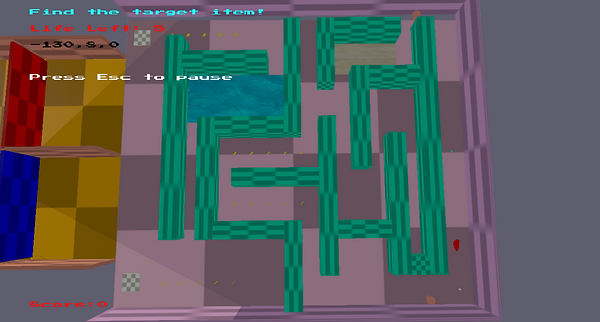
Maze Based on The Grids
More Code
13. Pushdown Automata
Another structure to implement AI is pushdown automata. This structure is based on state stacking. The logic of the state in the top will be performed. In this project, this structure is used to implement the menu system.
More Code
14. Network
The network is based on UDP protocol and enet library. In online games, there are server and clients. In this project, all of the game logic except some logic of the character controlled by the client is performed in the server. The game objects whose state is needed to be updated in clients will be assigned a "NetworkObject" with an unique "NetworkID" to make sure the object in server can find its corresponding object in clients. The object state which is needed to be updated will be saved in packets. The server will broadcast the packets to each client every frame. The clients will send the packet back to the server to update the state of the character controlled by the client, too. More details of the network of this project will be introduced later.

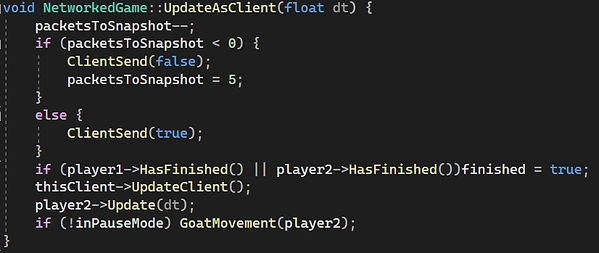
Update as Client
Update as Server
More Code
Gameplay
In this game, the player will be spawned in one side of the map. Player needs to find an item located on the other side of the map and take it back to the spawn point. To reach the other side of the map, the player needs to either find the key of the locked gate or try to cross a gap. Here's the gameplay I designed and implemented to this game.
1. Basic Movement
The code to implement the basic movement of the player is shown here.
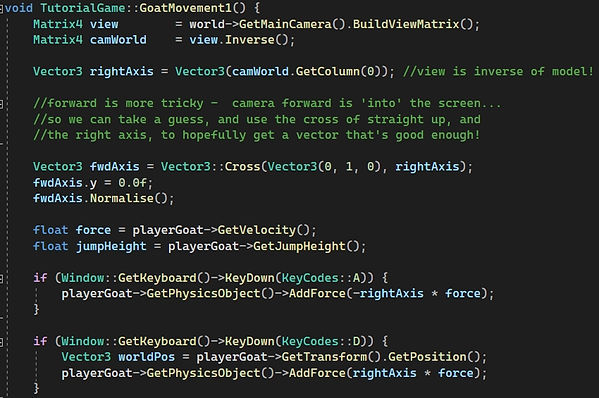
This function can be divided into three parts:
1. Calculate the forward and right vector of the camera to determine the forward direction for the character to move.
2. Locomote: When the player presses the key, the character will be moved by adding force in a left, right, forward or back direction. The force magnitude is the "velocity" variable of the player character which can be changed during the game.
3. Jump: When the player presses space, the program will check if the player is able to jump ("canJump" variable is true). If the player is colliding with the floor (type is bigger than 100), it is able to jump. The force magnitude is the "jumpHeight" variable of the player character which can be changed during the game.
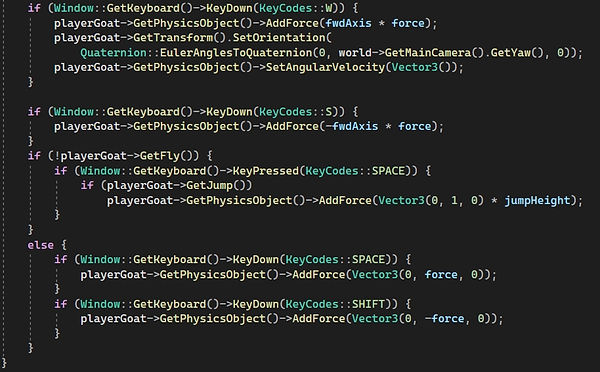


If the character is in flying (will be introduced later), it is not able to jump.
More Code
2. Camera Mode
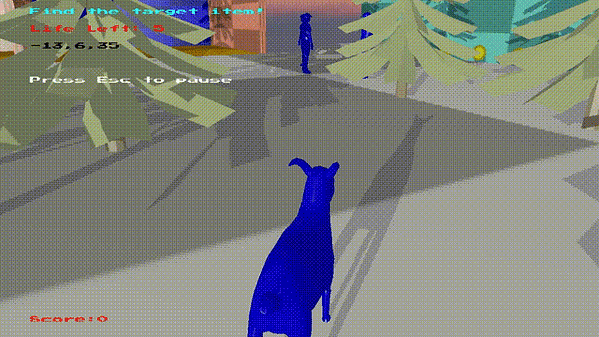
There three camera modes: main mode, free camera mode and top down mode. Player can change the camera by pressing certain keys.
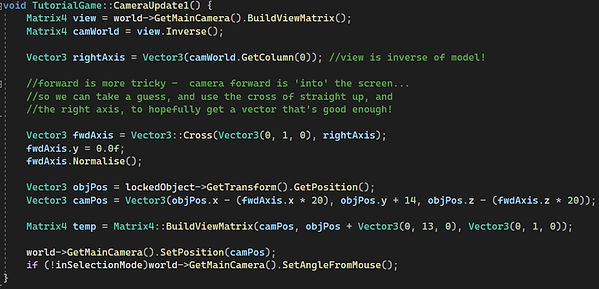
In the main mode, the camera is always above the back of the character. The rotation of the camera is controlled by the mouse.
More Code

3. Score System
In the top down, the camera is on the top of the player and cannot be rotated.
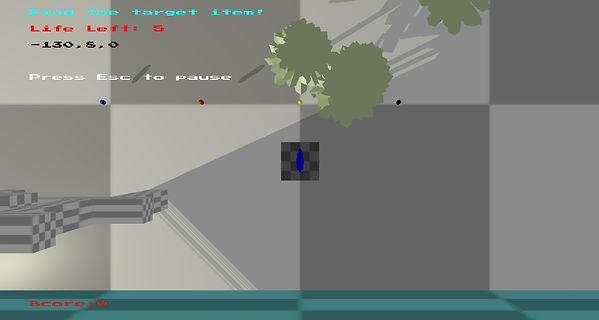
To mark the player's performance in the game, I implemented the score system to the game. They can obtain scores by doing certain things in the game like colliding with specific objects or collecting coins. Their score will be displayed both in the game and when they quit the game.
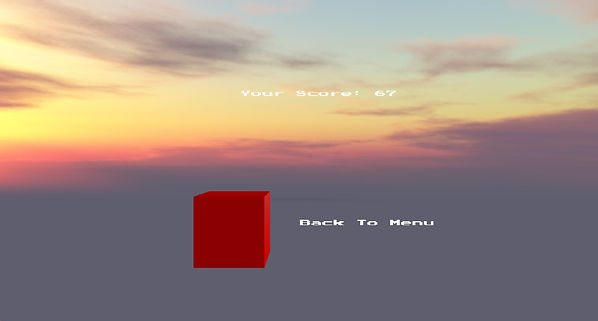
Score displaying when player quits the game
4. Powerup
Powerups are the most important things I added to the game to help the player to finish the game. There are seven different powerups in the game.
4.1 Picking up Logic
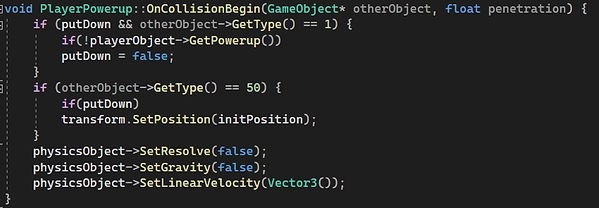
Initially, the "resolve" variable of the powerups are set to false in case it blocks the player when player touches it. When it is colliding with the player (type is 1) and the player doesn't have any powerups, its "putDown" variable will be set to false which means it is picked up.
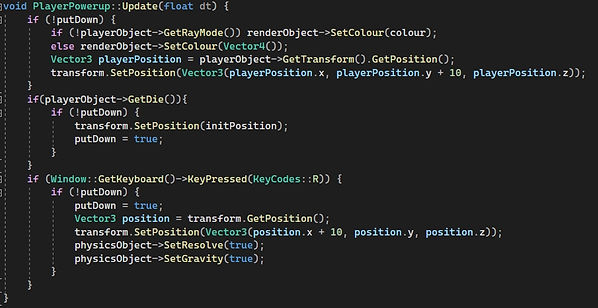
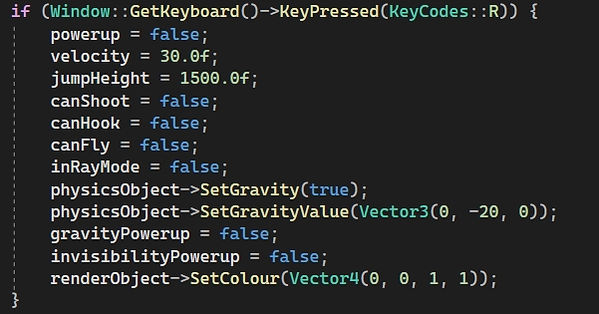
When it is picked up, it will be above the character. If the player dies, it will be teleported back to its initial position. If the player presses R, it will be dropped. At this time, the "gravity" and "resolve" variable will be set to true temporarily until it land in case it goes through the floor. The resolve method of it is set to projection so it won't be bounced up.
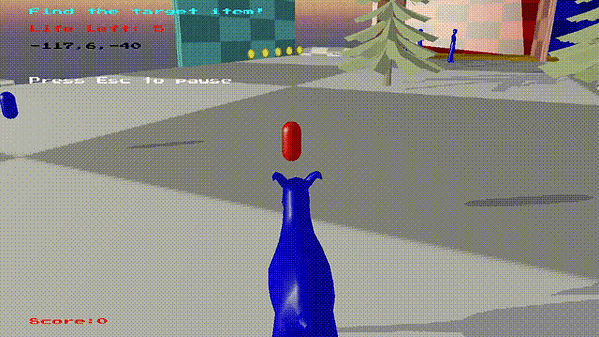
Player Pick up Powerup
4.2 Velocity Powerup
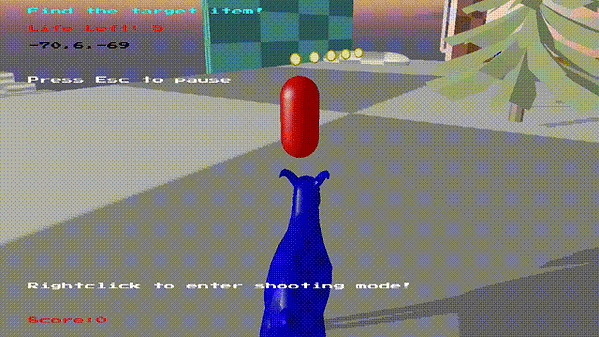
Player Drop Powerup
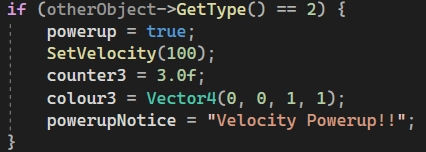
When the player gets the velocity powerup, its velocity will be set to 100 and be reset to its initial value when the player dropped it..
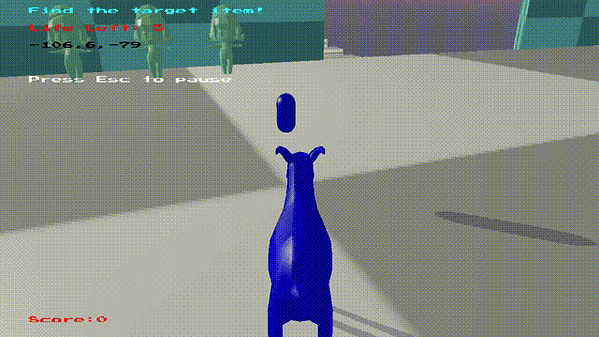
4.3 Jump Powerup
When the player gets the jump powerup, its "jumpHeight" will be set to 4000 and be reset to its initial value when the player dropped it..
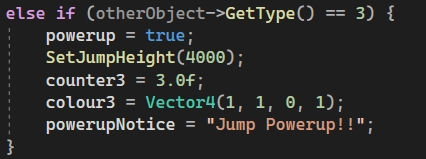
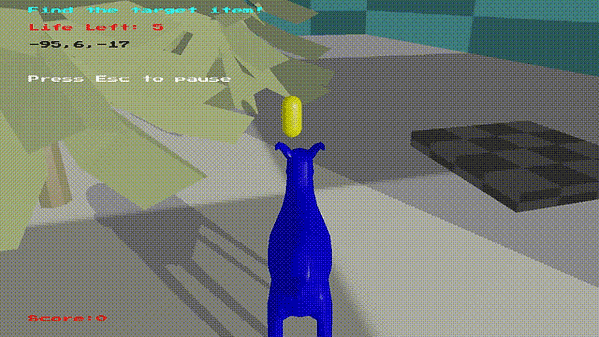
4.4 Shooting Powerup
When the players get the shooting powerup, they can enter the shooting mode and shoot at some objects in the game.
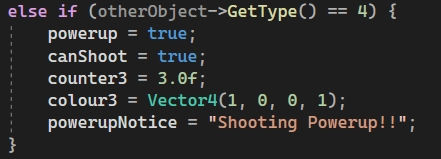
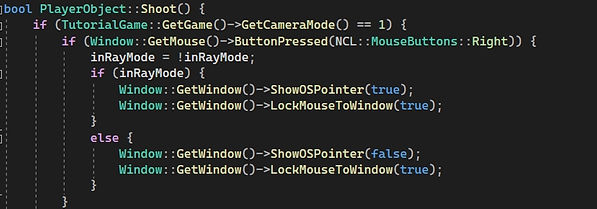
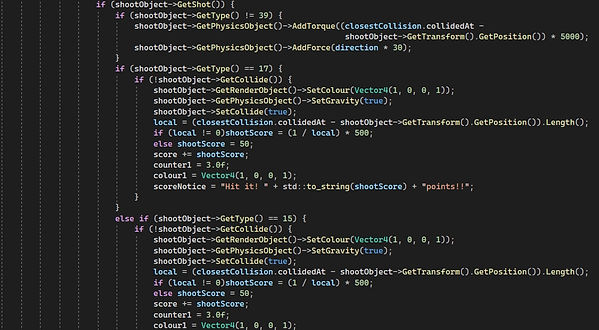
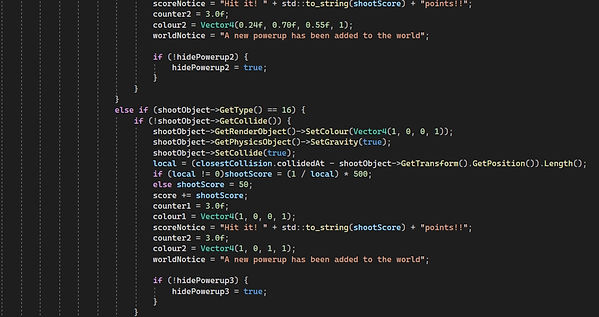
The shooting gameplay is finished in the function "Shoot()" and is based on raycasting.


More Code
This function can be divided into four parts.
1. Toggle the ray mode by right clicking. If it's in the ray mode, the OS pointer will be displayed. The powerup object will be hidden in case it block the player's vision.
2. If the player is in shooting mode, he can shoot by left clicking. When the player left click, a ray starting at the location of the camera and casting to the pointer's location will be launched.
3. The next step is to detect if the ray hit any objects, the "Raycast" function in the "GameWorld" class is accessed by referring the game instance.

If the ray doesn't hit any object, this function will return false. If it hits, the hit object will be saved in the variable "shootObject". A line starting at the player's position ending at the object will be drawn to let the player know if where they shot at.
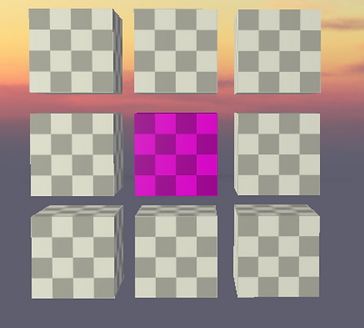
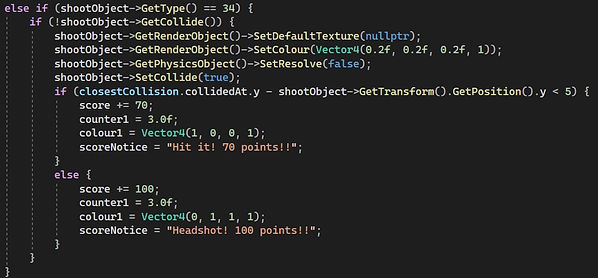
4. Next step is to detect if the hit object is designed to have respond to the shoot. For example, there are several target blocks in the map (type is 15). If the players manage to shoot at them, they can gain scores and the block shot will be applied to force and torque. The direction of the force value is the direction from the player to the object. The torque will be applied at the point where the ray hit the object. And the more close this point to the centre of the block, the more scores players will get.
After being shot, the gravity of target block will be activated and it can not be shot again. Since the "resolve" tag of them are set to false, they will not collide with other objects.
Besides, if the player shoot at some special target blocks (type is 16 or 17) which is coloured, a hidden powerup will be added to the world.

There are some other objects which have respond to the shooting will be introduced in later sections.
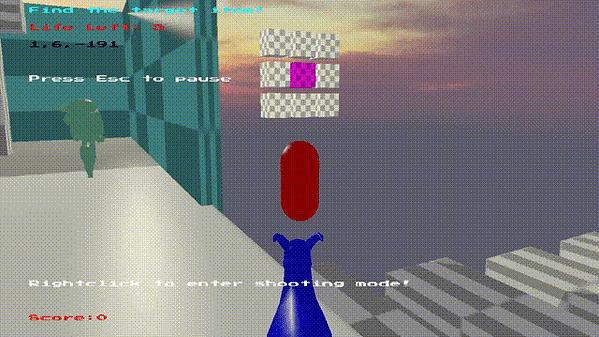
4.5 Hook Powerup
When the players get the hook powerup, they can use the hook to move like spider man.
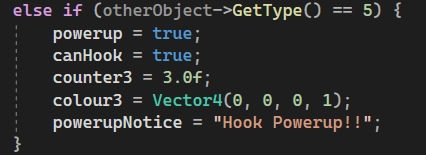
When the players get the hook powerup, they can use the hook to move like spider man.
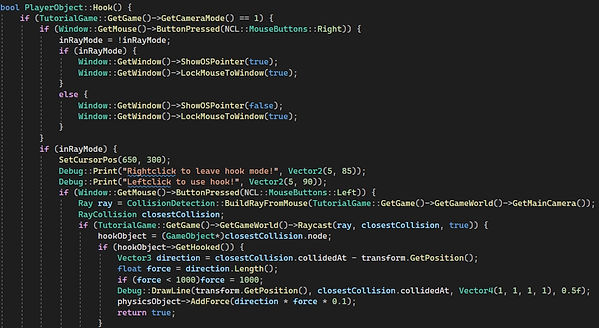

Like shooting, hook is also based on raycasting. This gameplay is implemented by the function "Hook". The former part about toggling hook mode of this function is same as the "Shoot" function. The difference is that, if the object hit by the ray is set to "can be hooked", a force will be applied to the player. The direction of the force is the direction from the player to the object hit by the ray, and the magnitude of the force is in direct proportion to the distance between the player and the object with a minimum value of 1000. Similarly, there will also be a line drawn to show player where they hooked hit.

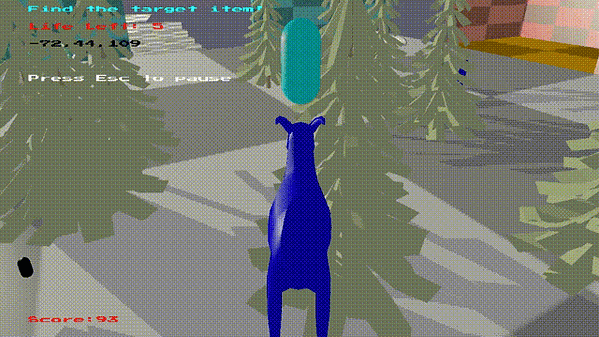
4.6 Fly Powerup
The player will be able to fly if he gets the fly powerup. His gravity will be deactivated.
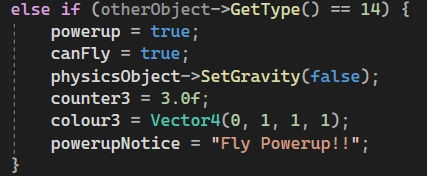

Like locomotion, the flying is finished by applying force.
4.7 Gravity Powerup
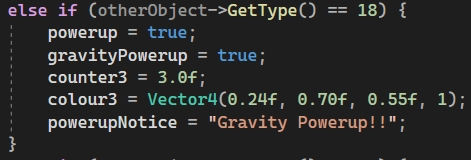
The player is able to switch the gravity value of itself when they get the gravity powerup.

4.8 Invisibility Powerup
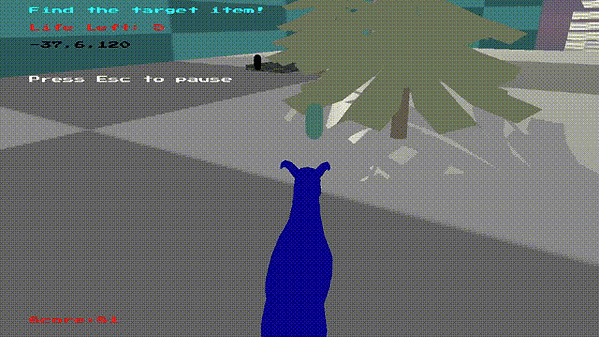
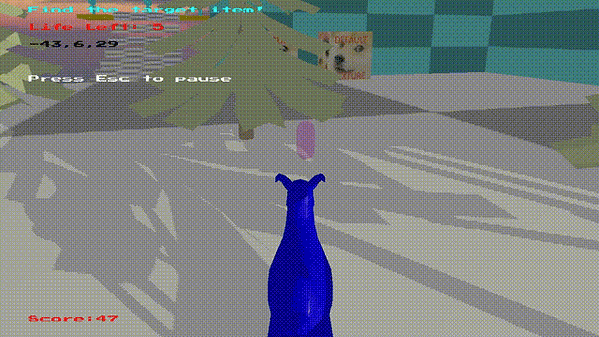
The player will be invisible when he gets the invisibility powerup.
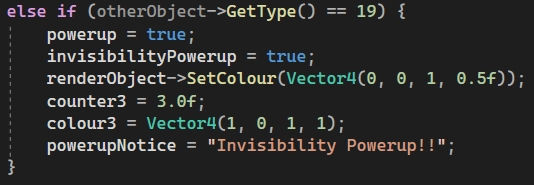
More details of this powerup will be introduced in later sections.
More Code
5. Colliding Scores
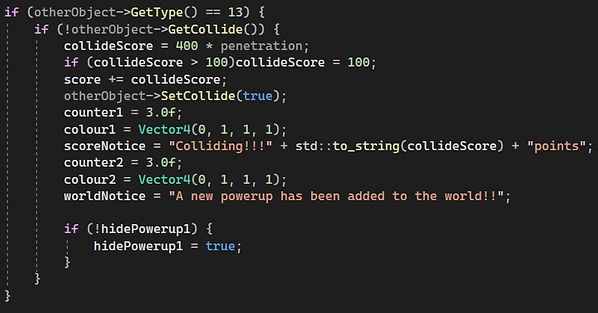
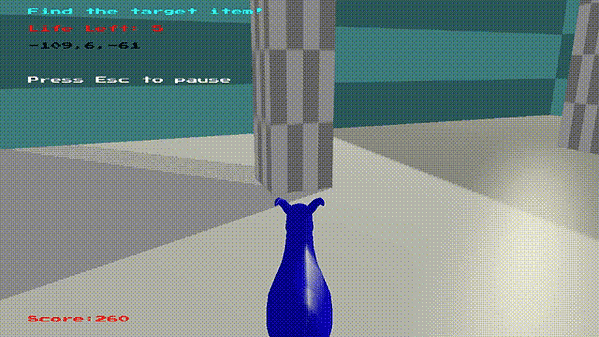
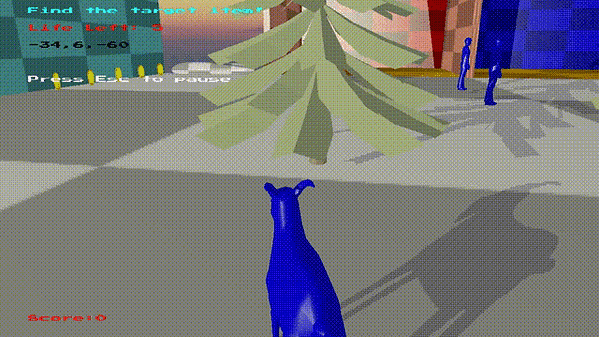
When the player collides with some objects in the game, they can gain scores. These objects include a tower consisting of several blocks and sphere, several trees and several blue NPC moving in the map.

As mentioned above that the collision is detected when an object intersecting with another object. The scores gained from collision is in direct proportion with the penetration distance. The more the two objects intersected, the more scores gained.
The object being collided by the player will be set to grey and will fall from the world: their "resolve" is set to false so they can't be colliding with the floor and fall from the world.

If the player manages to collide with the sphere in the top of the tower, they can unlock a new hidden powerup.
The blue NPC moving in the map is based on state machine.

More Code
6. Gates and Keys
There are a blue gate and a red gate in the middle of the map, and there are a blue key and a red key in two islands on the two sides of the map. The player has to collect the same colour key to pass through the corresponding gates.
The inverse mass of the gates will be set to 0 if the player doesn't have the key, and will be set to 1 when player gets the key.

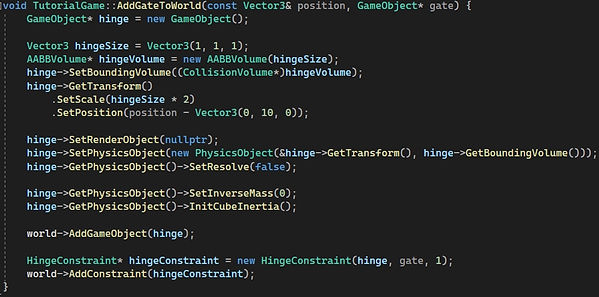
Besides, the gate is also an orientation constraint. After the gate is added to world, a hinge with 0 inverse mass and will be added to the world. The orientation constraint is that the difference of the pitch and roll of the hinge and the gate should always be 0. Since the hinge cannot be moved, the pitch and the roll cannot be changed to. So only the yaw of the gate can be changed which makes it works like a gate.
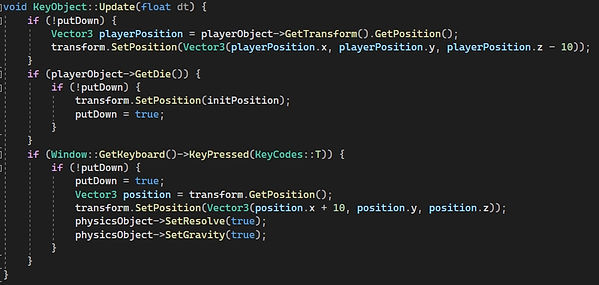
The keys are similar to the powerups. They can be picked up and dropped by the player. When the player picks the key up, it will be on the right side of the player.
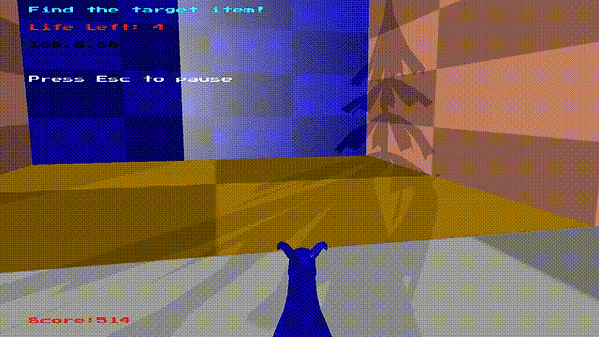
Pass the gate with the correct key
More Code
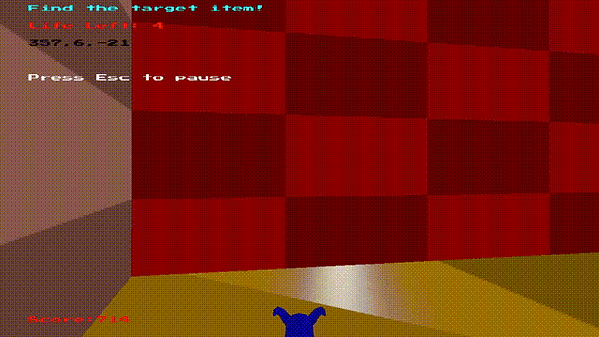
Cannot pass without the correct key
7. Rope Bridge
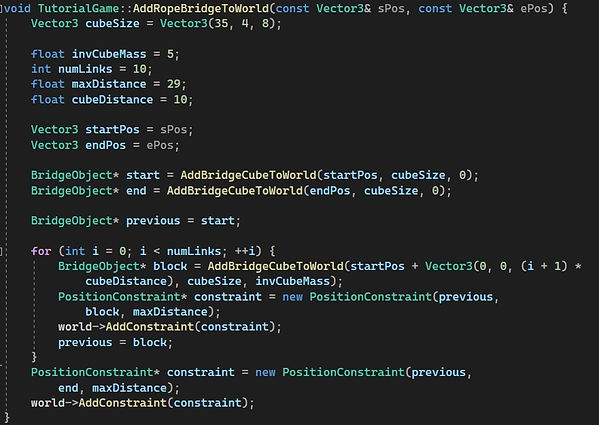
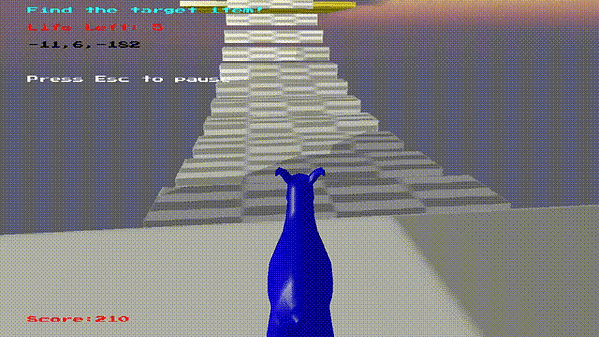
There is a rope bridge connecting the floor with two islands. The rope bridge is an implementation of position constraint. The first and last cube of the bridge is fixed and the distance between two cubes should be maintained at 29. When the player steps on the bridge it will change colour.
More Code
8. Pushing Bar
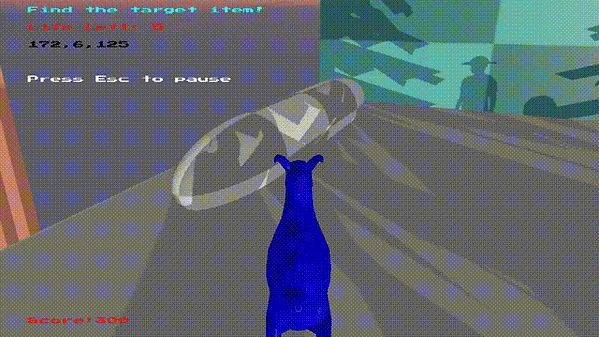
There are two pushing bars in front a gap in the map. It can push the player to the other side of the gap. It is implemented using state machine.

More Code
9. Jumping Pad
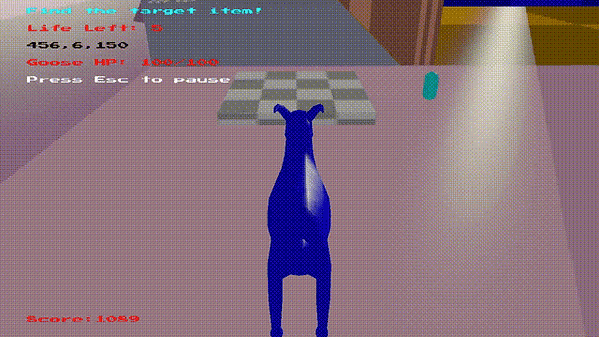
There are two jumping pads behind a gap in the map. When the player jumped onto it, it will bounce up the player. The "elasticity" variable of this pad is set to 18 which allows it to bounce the player to a high place.
More Code
10. Coins
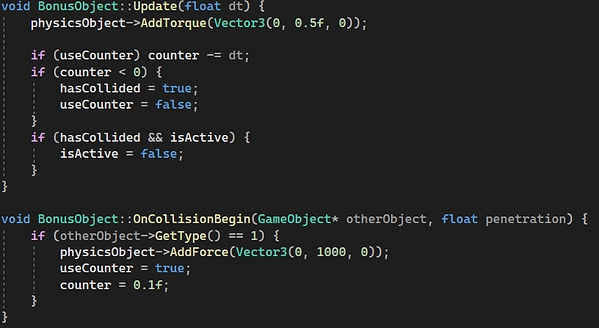
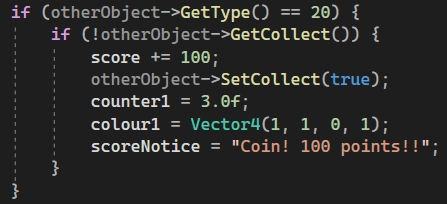
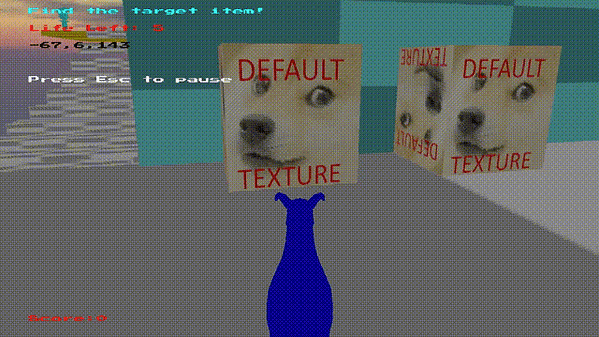
There are many coins in many places of the map. The player can gain extra scores by collecting coins. Initially, the coins are rotating. When the player is colliding with the coin, it will moving up and disappear. This is finished by applying force and using counter. Since the collision might be lasting for several frames but the score should be added only once, a flag is set to only add the score for once.
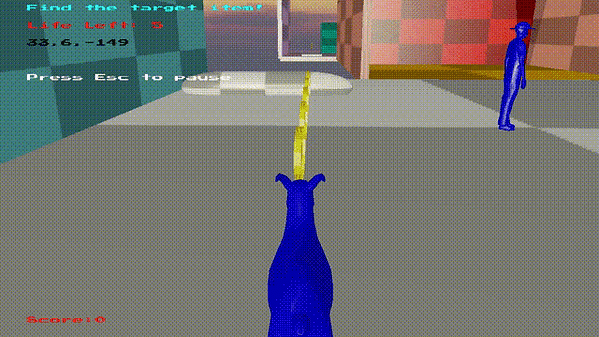
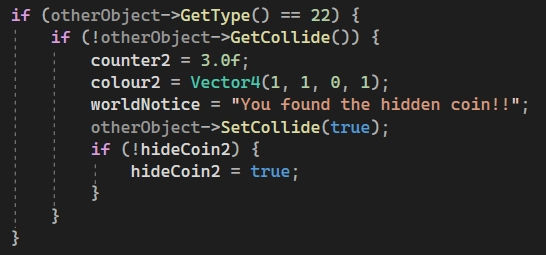
There are two blocks on the right side of the spawn point. When player collides them, hidden coins will appear. The collision with these two blocks is resolved by penalty method.

More Code
11. Score Trigger
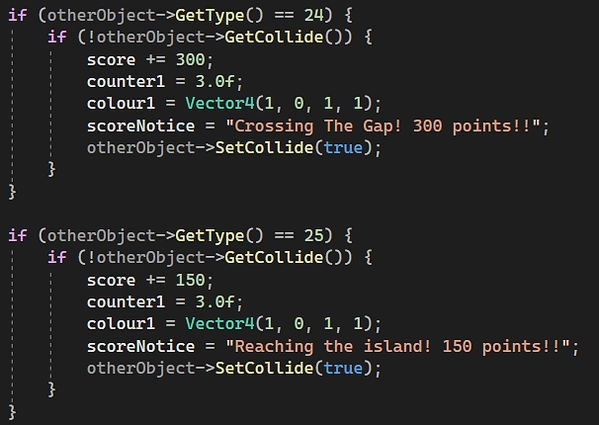
Score trigger is a big cube object that is invisible, and the collision with it can only be detected and will not be resolved. When the player is detected to be colliding with it, scores will be given to player. There are six score triggers in this map, two is in the middle of the gap, two is behind the gates and the other two is in front of the two islands. That means when player managed to cross the gap, unlock the gate or reach the islands, scores will be given to the player.
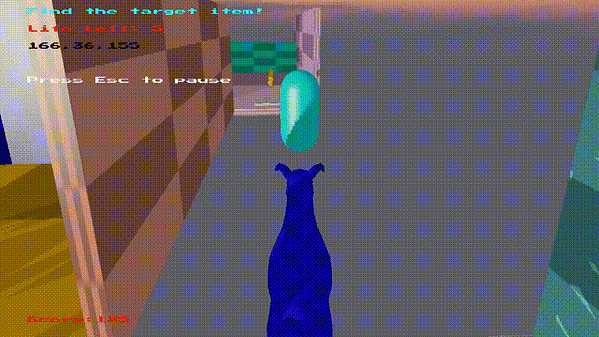
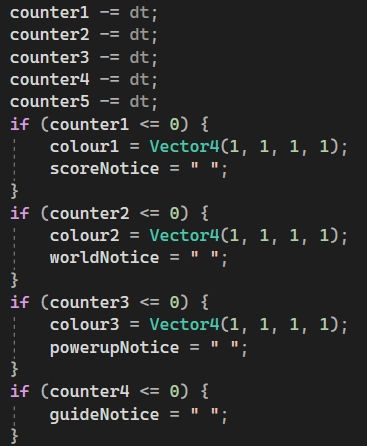
When the player pick up some items or gain scores, there will be message printed on the screen for several seconds. This is finished by counters.
More Code
12. Target Item
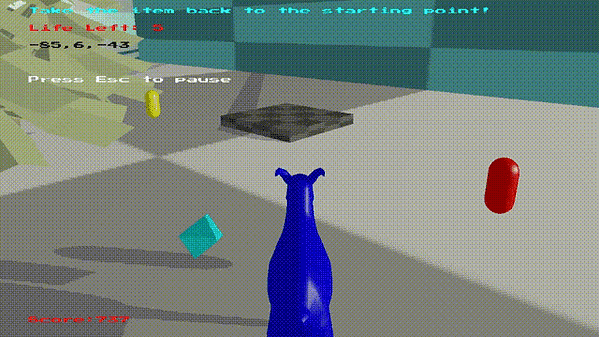
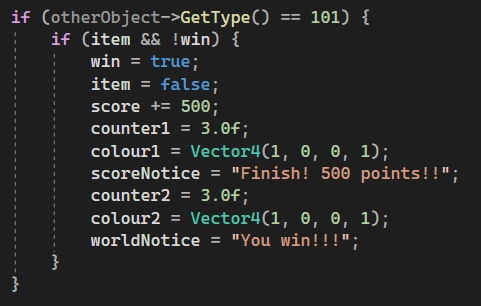
The target item that the player should collect is located in a maze in the map. Like powerup and key, it can be picked up and dropped by the player. When the player picks it up, it will be on the left side of the player. When the player take it back to the spawn point (type is 101), the game is finished.
More Code
13. Border
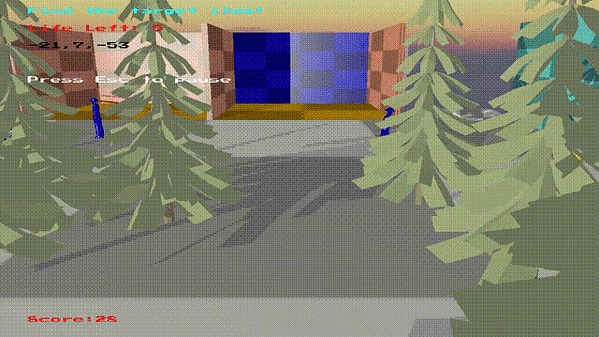
There are six border walls enclosing the whole game world. Like score triggers, it is invisible. Any objects touching the border (type is 50) will be cleared out of the game, except the player, who will die, powerups, keys and the target item who will be sent back to its initial location.
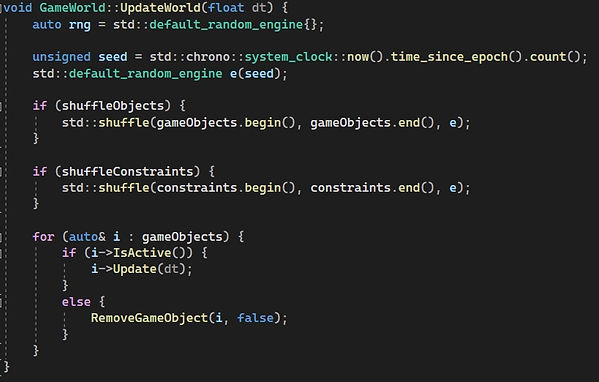
When an object is added to the world, it will also be added to the object list in "GameWorld" class and its "isActive" tag is true. The "UpdateWorld" function in "GameWorld" class will traverse all the game objects in the game and perform the overloaded "Update" function of each game object that is active. If an object is found to be not active ("isActive" is set to false) anymore, this function will delete this object from the list which means this object is cleared out from the game to save the computing spaces.


Trees being cleared when reached the border
More Code
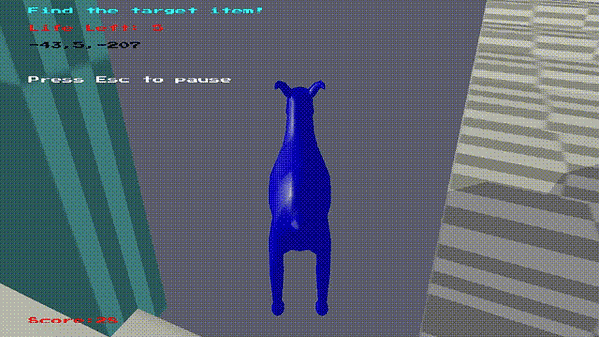
Player died and was sent to spawn point when reaches the border
14. AI
14.1 Guide AI
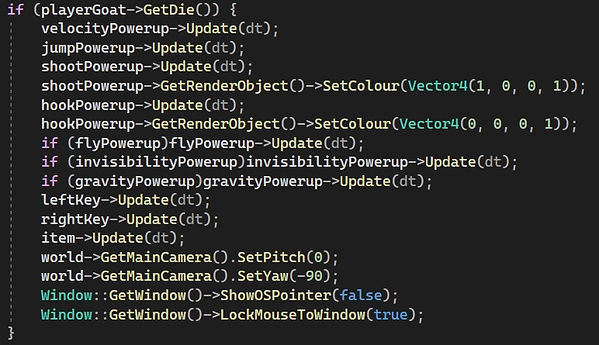
There are three guide AI on the left side of the spawn point. They'll give player some hints about the hidden powerups or coins when player collides with them. If the player has already unlocked the hidden item, they'll say congratulations to the player. Moreover, if the player gets the invisibility powerup, they'll say something else.
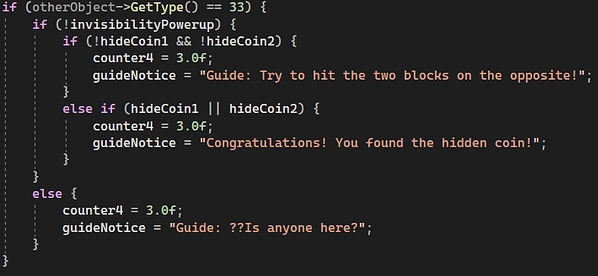
More Code
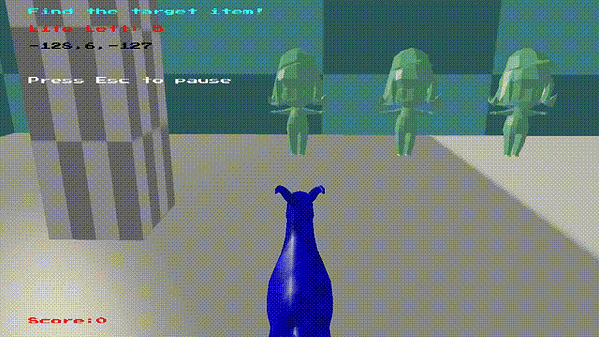
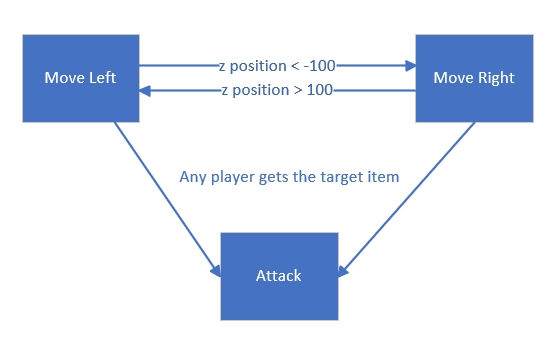
14.2 Shooting AI
There are three AI characters in the island on the right side of the world who will shoot at the player like player's shooting powerup. Before the player enters the rope bridge in front of the island, they'll look around. And once player enters the bridge area and doesn't have the invisible powerup, they'll start to shoot at the player. If the player leaves this area or becomes invisible, they'll start to look around again. They are based on state machine.
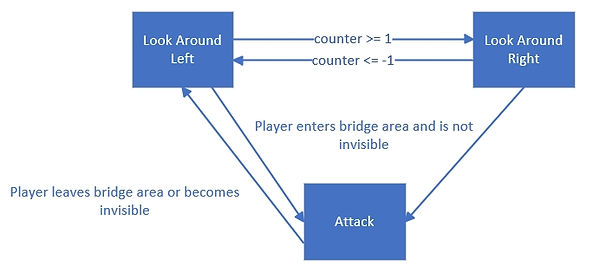
When they are looking around, they'll be rotated in different directions.

Their attack logic is finished in the function "Attack". This function cen be divided into three parts:
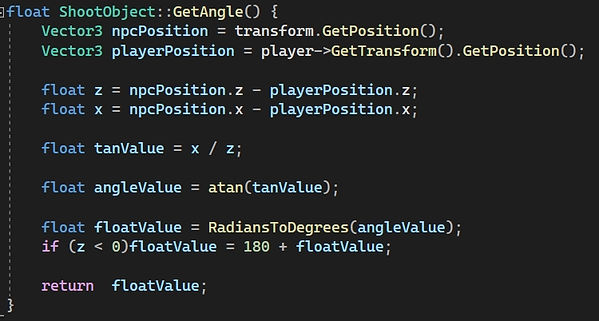
1.Update orientation: When they are in attack state, they'll always face to the player, this is calculated by the function "GetAngle".
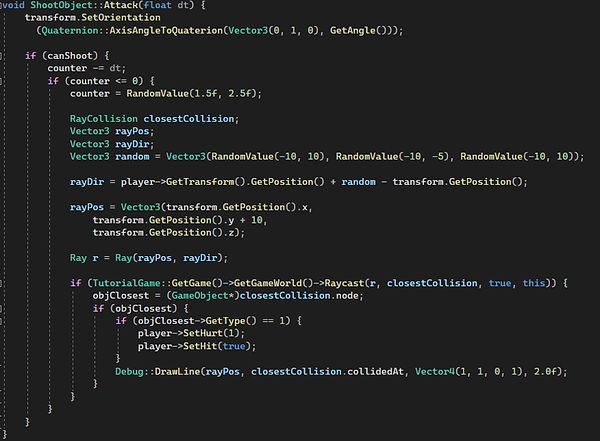
2. Launch ray: a ray will be launched every random time, the start position of the ray is around the head of the shooting AI. The direction of the ray is from the AI to the player with some random offset to make sure the ray can also miss out the player. A line will also be drawn to show where they shoot at.
3. The final step is to detect if the player is hit by the ray, if so the health of the player will be decreased by 1. When the player is hurt, it will become red for a little while, and in this time it cannot be hurt again.
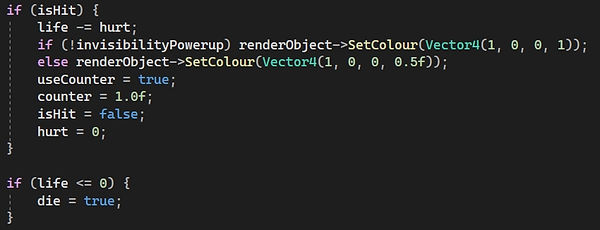

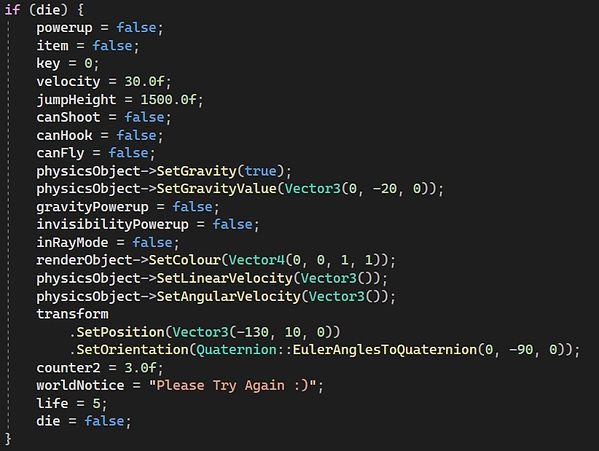
The player has 5 HP in total, if it was decreased to 0, the player will die and sent back to spawn point. The powerup, key or item carried by the player will be dropped and sent back to their initial positions.
The player can also shoot at or collide with the shooting AI, if they are collided or shot by the player, the state machine logic will stop and they will die and fall out from the world. The player can gain scores if he manages to shoot at the AI, and if the player shoots at the head of the AI, more scores will be gained.
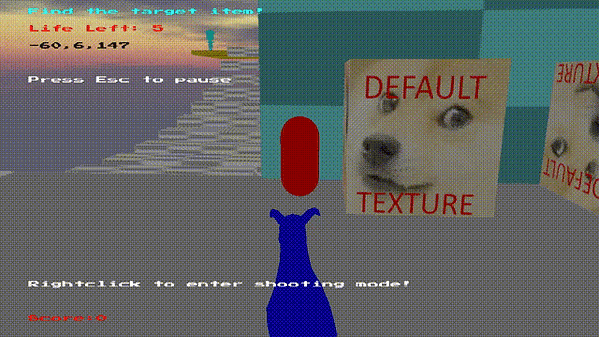
Player attacking AI
More Code
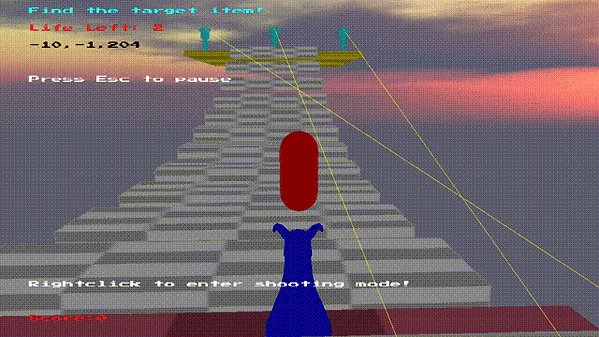
Player die
14.3 Throwing AI
This kind of AI located in the island on the left side of the map is very similar to the shooting AI. The state machine of it is the same as the shooting AI. They'll also be looking around before finding the player and they can be attacked by the player. The only difference is that when they find the player, they'll through objects to the player instead of shoot at the player.
The "Attack" function is also very similar to the "Attack" function of the shooting AI. The orientation of the AI will be updated firstly. Then a bomb object will be spawned in front of the AI. A force towards the player with offset and torque will be applied to the object to throw the object to the player.
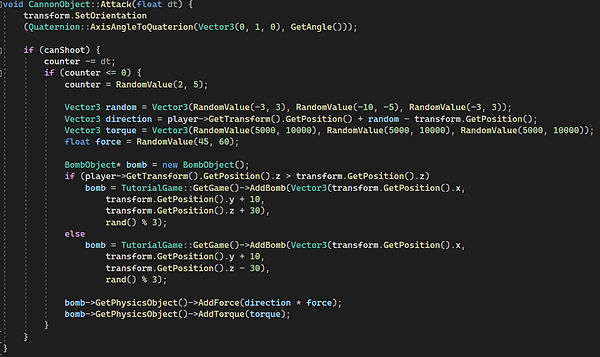
The bomb can also be shot by the player. The player can gain scores if he hits a bomb, and the score is in direct propretion with the speed of the bomb.

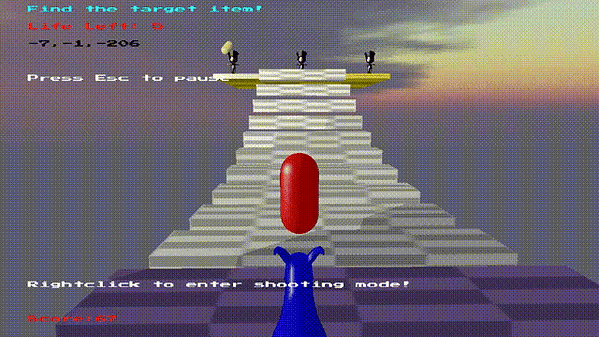
Player shoot at bomb
More Code
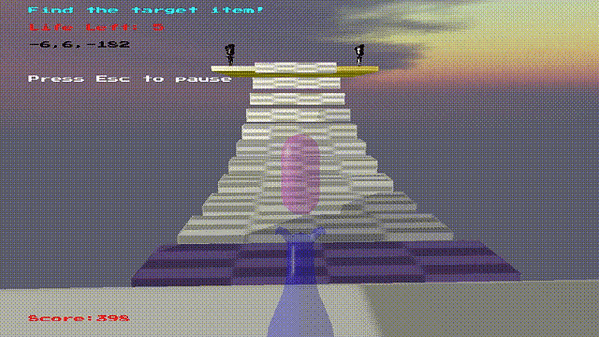
AI can't see invisible player
14.4 Patrol AI
There are rwo patrolling AI in the maze area. They are based on state machine. When the player is not in the maze, they'll move around their initial position. When the player enters the maze and is not invisible, they'll go to the player by pathfinding. When they see the player, they'll try to collide with the player. The player's HP will be decreased if he is collided by the patrol AI. If the player leaves the maze or becomes invisible, the patrol AI will pathfind back to their initial position. In this process, if the player reappear in the maze, they'll continue to attack the player. And when they move back to their initial position, they'll start to move around their initial position again.
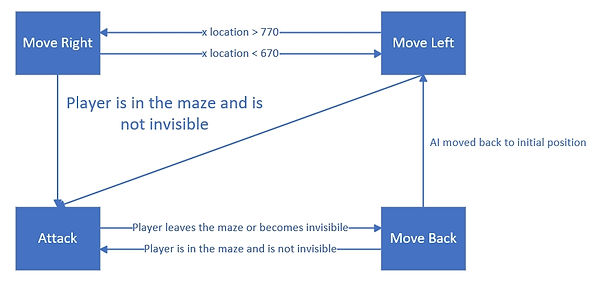
The logic in Attack state is in the function "Attack".
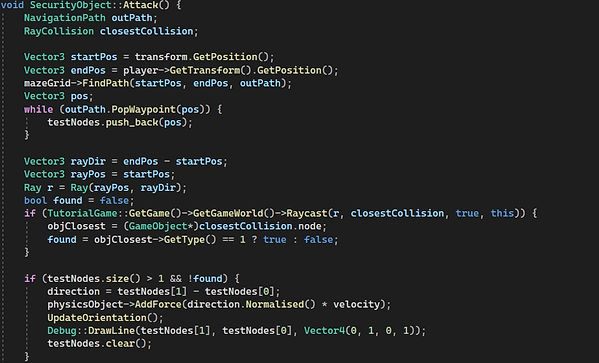
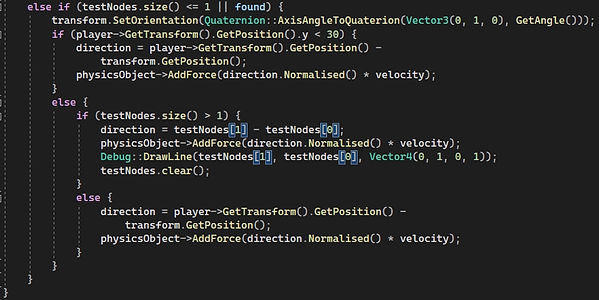
In this function, the path from the AI's position to the player's position will be found firstly. Then, a ray starting at the AI's position casting to the player's position will be launched and see if the first object the ray hit is the player, if so, the player can be regarded as "found by the AI", which is saved in bool variable "found". The movement of the AI is decided by both the path and "found". There are four cases in total.
1. If the AI neither reached the end of its path nor found the player, it will continue move throuth the path.
2. If the AI found the player, the player might be flying above the maze, if not, it will move directly to the player no matter if he has reached the end of its path.
3. If the player found by AI is flying above the maze and the AI hasn't finished its path, it will continue to move through its path.
4. If the AI has reached the end of the path, this means it has reached the grid where the player is in. It will move directly to the player. If the player is flying, it will move to the place right beneth the player.
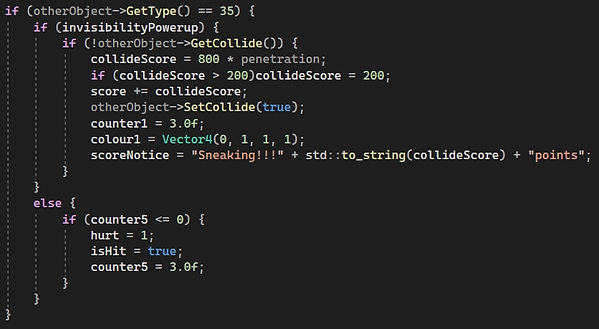
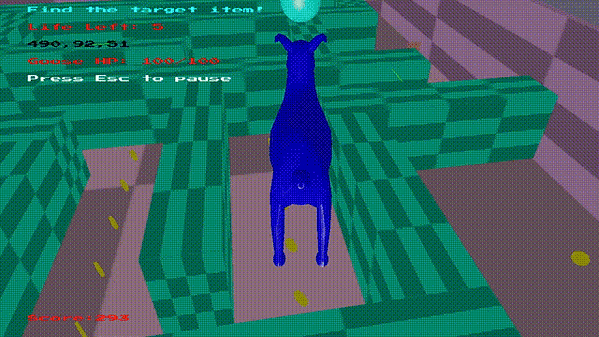
To defeat the Patrol AI, the player can either shoot at them (only when the player is in the maze) or collide with them when he's invisible.

More Code
14.5 The Goose
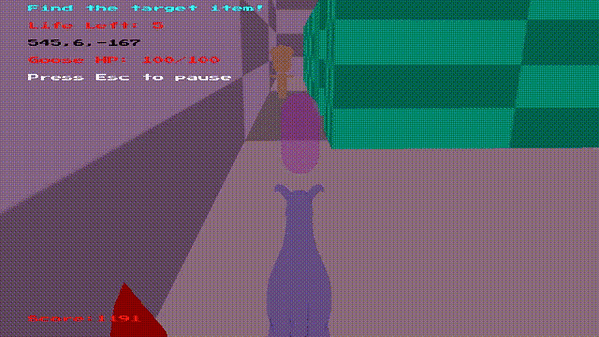
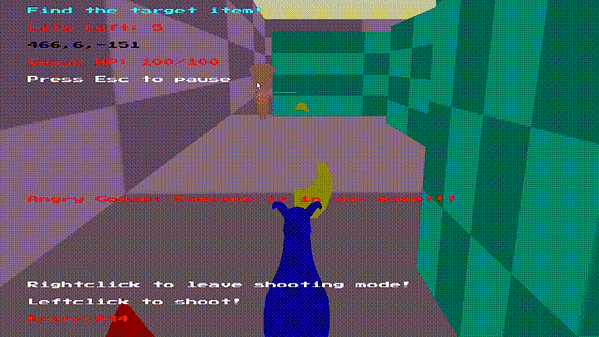
The goose is the most important and complicated AI in the game. Before the player gets the target item, the logic of the goose is almost same as the patrol AI. The only difference is that it will find the invisible player of the invisible player collides with it. And it can only be defeated by shooting. Its HP is 100 which means the player has to hit it at least 100 times. If the player gets the target item, the goose will perform the logic in the behaviour tree. The goose has some dialog which can make the game more vivid.
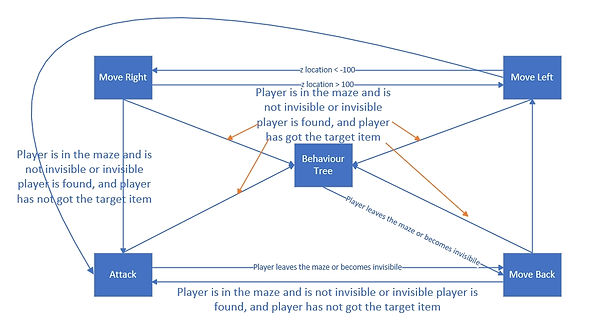

When the player gets the target item, the goose will move to its powerup. When the goose gets its powerup, it will get one of the three powerup randomly: velocity powerup: it can move faster, lock gate powerup: player can not open the gate even he gets the key and attack powerup: will cause twice damage to the player. After it gets the powerup, it will start to chase the player.

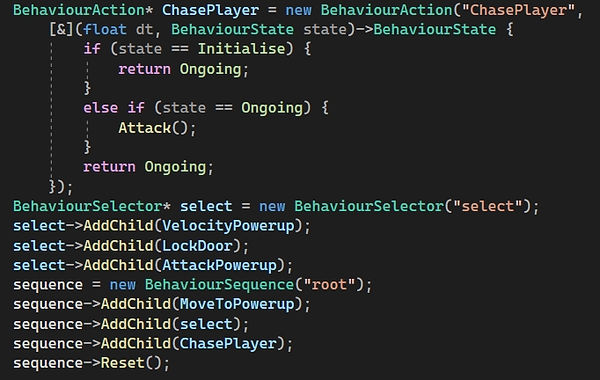
When the player gets the target item, the goose will move to its powerup. When the goose gets its powerup, it will get one of the three powerup randomly: velocity powerup: it can move faster, lock gate powerup: player can not open the gate even he gets the key and attack powerup: will cause twice damage to the player. After it gets the powerup, it will start to chase the player.
The pathfinding logic of the goose is similar to the patrol AI. The only difference is that, there is a water area (type is 38) in the maze. It will speed up the goose while slow down patrol AI and the player. So when creating navigation grids, the cost of this area (&) for patrol AI is 40 while it for the goose is 0.01. So the patrol AI will avoid this area when pathfinding while the goose will prefer this area. Another thing to note is that there is a plank area (%) in the maze whose "friction" variable is higer than other objects. So all the characters will be slown down in this area. And both the patrol AI and the goose will try to avoid this area when pathfinding.

Water area speed up the goose
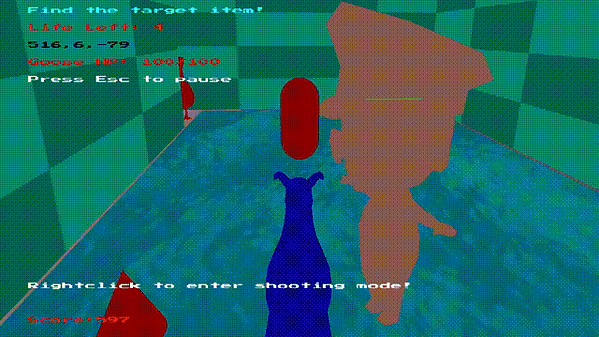
Water area speed up the goose

Water area slow down the patrol AI
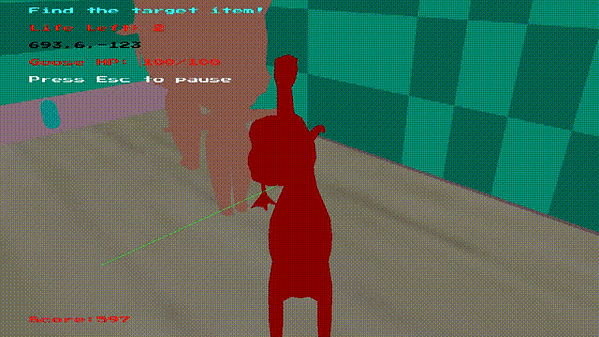
Plank area slows down all characters
When the player shoots at the goose, there will be force and torque applied to the goose to slow it down.

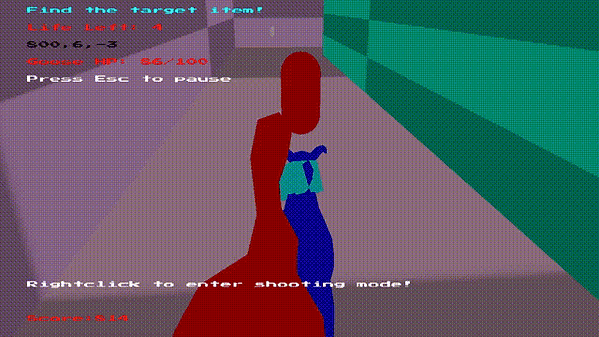
Goose gets its velocity powerup
Player shoot at patrol AI and the goose
More Code
15. Menu
The menu interface of this project is essentially some objects in the scene with some message printed on the right side. Each object has an unique "type" variable that marks which object it is. When the mouse hovers on it, it will chagne colour. This is finished by raycasting. There are six interfaces in this game in total: main menu, choose server menu, pause menu, quit menu, single player game and multi player game. These interfaces are organized by pushdown automata. Each interface is in a state of the pushdown automata. When the player clicks on an object, the "type" of this object will be returned to the "OnUpdate" function in class "PushdownState".
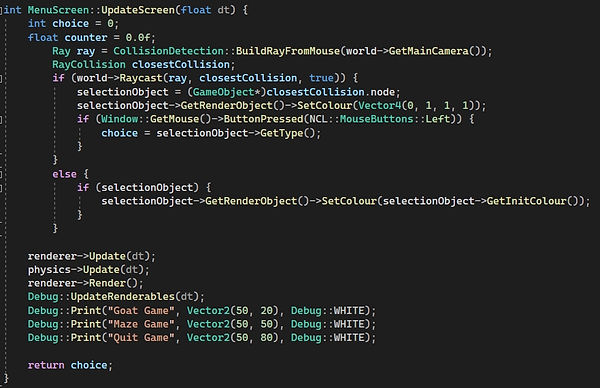
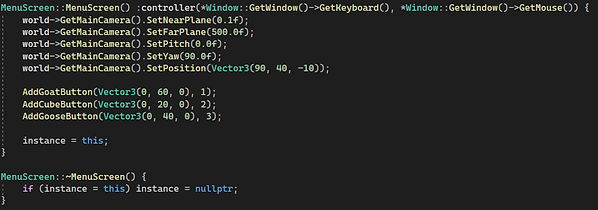
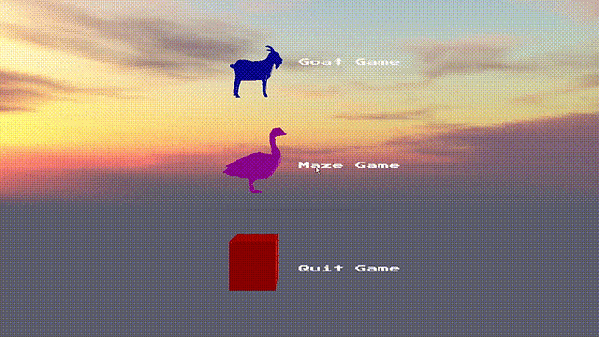
In the "OnUpdate" function in "PushdownState" class, the choice returned will determine what the next interface is: push a new state or pop out one or more states. The model of this pushdown automata is shown below.
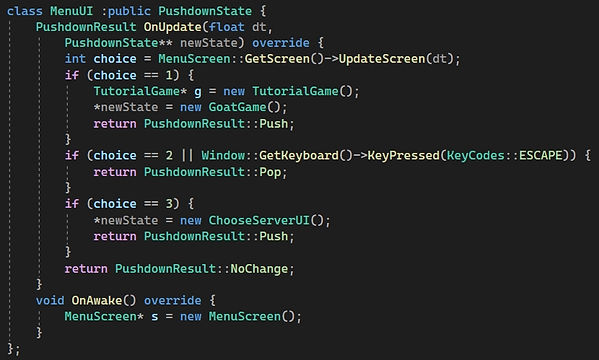
More Code
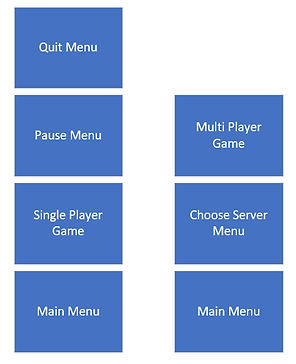
16. Network
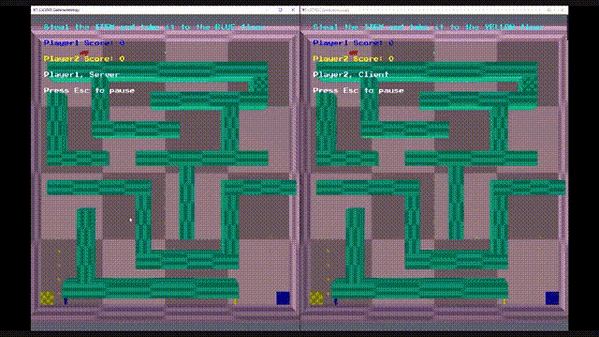
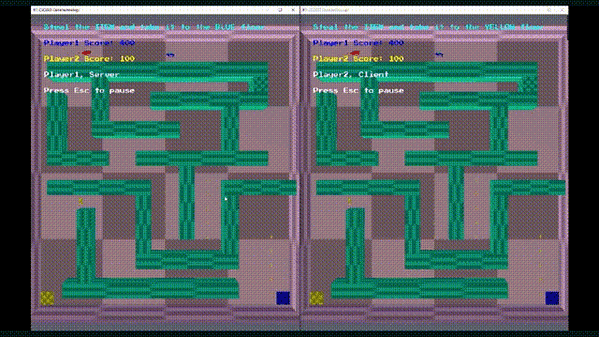
The multi player game of this project is different with the single player game. In the multi player game, there is only the maze area. There are coins, a target item and an AI enemy goose in the maze. The player will get 100 scores when collecting a coin and 1000 scores when the player manages to get the target item and send it to the destination. The goose will be chase after the player who carries the item. And every time the goose collides with the player, the player will lose 50 scores.
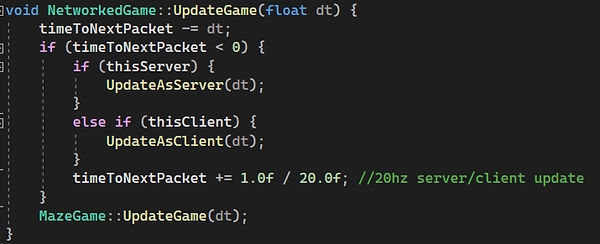
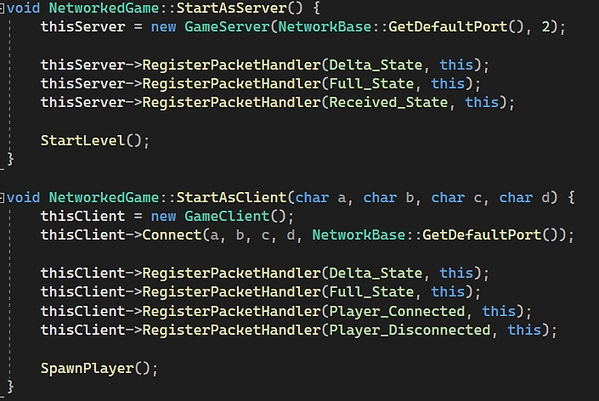
Currently, the online game can only be played through local host. The player can choose to play as server or client. The logic of the players, the coin, the goose and is performed in server and will be updated to the client via the network except the client player. Besides, the logic of the client player will also be performed in client and updated to the client via the network. When the player chooses to play as server, the function "StartAsServer" will be performed, and only "UpdateAsServer" will be performed when updating per frame, vice versa.
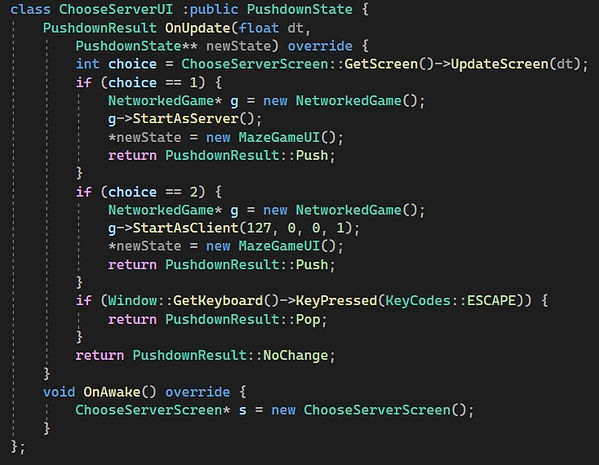
When starting as server, the server will be created firstly, then the pakcet handler will be registered. And the game objects will be spawned. When starting as client, the client will connect to the server firstly. Some packet handler will be registered here, too. Before the client joins the server, there is already an avater of the client player spawning in the game where cannot be seen. When the client joins the server, this avater will be respawned to its staring position.
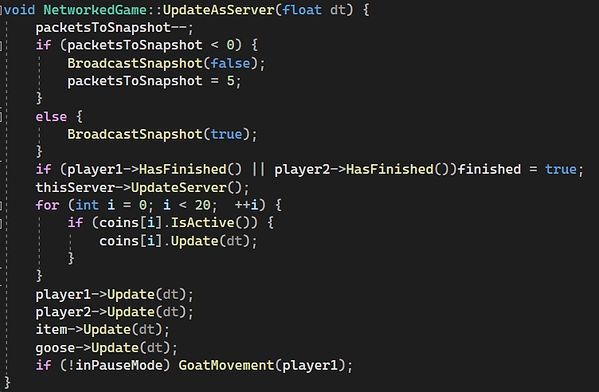
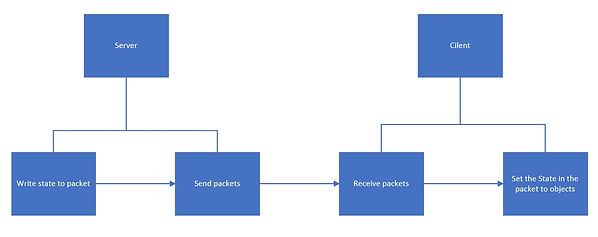
When updating as server, the server will broadcast the states of the game objects to all the clients. Next the server will check if any player has put the item to their destination, if so the game will end. Then the server will receive the packets from client to update the state of the client player. Finally the game objects will be updated. When updating as client, the client will send the state of the client player to the server. Then it will also check if any player has put the item to their destination. The cilent will then receive the packets from the server to update the objects. Finally it will update the client player.

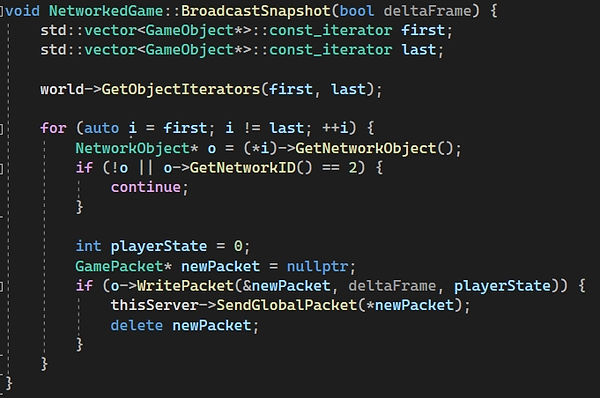
All the game objects that is needed to be updated to the client have a "NetworkObject". The server will traverse all the obejcts who have a "NetworkObject". Their "NetworkObject" will then write the information which is needed to update to the client to the packets.
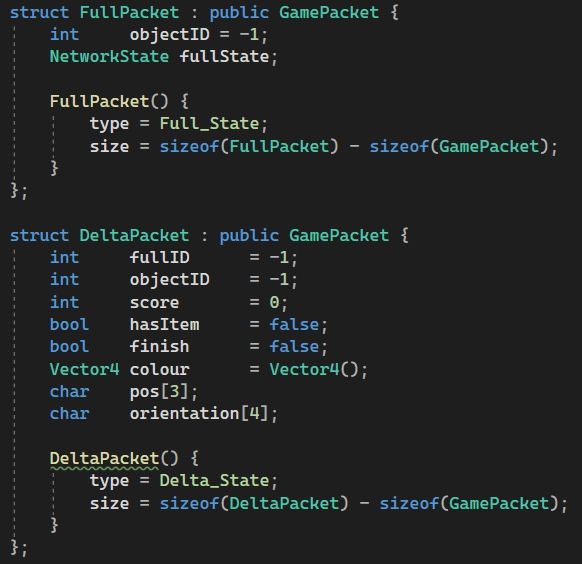
The type of the packet used in this project is full pakcet and delta packet which will carry the states of the objects. In this game, the state needed to be updated includes the object's position, orientation, score, colour, if it carries the item and has it sent the item to its destination. A state ID is added here to guarantee the synchornization is correct.
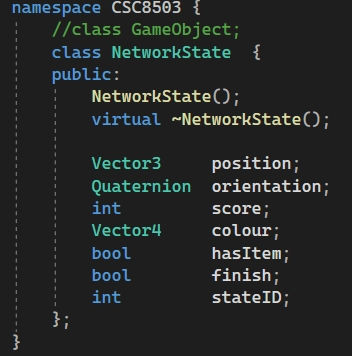
The "NetworkObject" can write the states of the object to the packet and set the state of the object when after receiving the packes
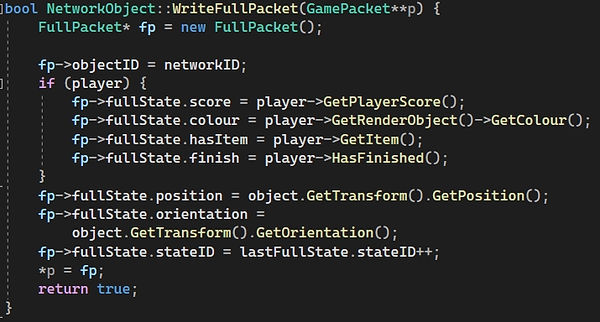
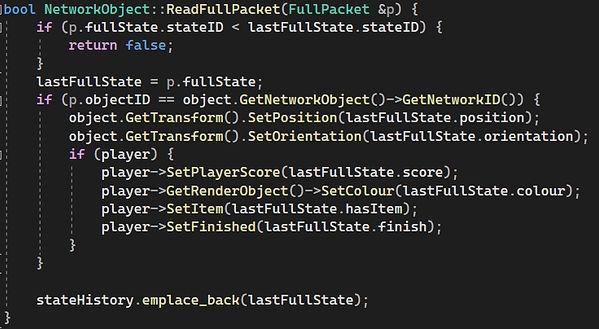
The whole transimission can be described in this diagram. The process of client sending packets back to the server is the same.
The goose in this mode is an AI based on state machine.
More Code
Summary
In summary, this project implemented the most important and basic skills to develop a game which mainly includes the physics engine, the AI logic and the network. There are also some improvement can be made to this project: More collision volume like capsule and plane. And a debug function to show the collision volume of each objects can be added. The engine of movement can be enhanced to make it more real and smooth. Finally, the network can be improved to make it possible to play through multiple computers instead of just using the local host.
The final grade of this project is 92%. The tutor of this module Dr. Rich Davison commented about this project: An excellent demonstration of many of the module elements. A nice thematic level design. Collision resolution has been augmented with both friction and penalty code. Networking is also present in a more basic sub-game. In general, the code is well laid out, and split up into different classes as appropriate. It is clear that you have engaged with all elements of the course material. Excellent work!